
Gnocchi Pasta Bake with Roasted Veg and Smoked Pancetta
This easy pasta bake uses gnocchi and is packed full of roasted veg, the aubergine and the smoked pancetta come together to make a delicious baked pasta dish.
Gnocchi is a great pasta to use for an al forno dish, this means it’s baked in the oven. Here I combine it with roasted vegetables like aubergine with smoked pancetta and chilli flakes for a flavoursome, smoky sauce with a little heat.
If you want to make this dish even quicker just top with mozzarella but if you want to add a later of creaminess and extra comfort make my white sauce to layer on top before finishing with mozzarella.
Prep time: 5 minutes | Cook time: 30 minutes | Serves: 2-3 Calories: 643 calories per serving
Ingredients
- 500g gnocchi
- 75g diced smoked pancetta
- Aubergine, diced 1cm cubed pieces
- Courgette, quartered in slices
- Red Onion, quartered into segments and then halved again into eighths
- 1 tsp chilli flakes
- 1 tsp oregano
- 500g passata
- 1 ball of mozzarella
- Olive Oil
Optional white sauce
- 30g butter
- 30g plain flour
- 300ml milk
Instructions
Pre-heat the oven to 190 degrees (fan oven)
Add the pancetta to a baking dish, and place in the oven while you prep your veg.
Dice the aubergine in to 1 cm cubed piece, quarter the courgette and the red onion, and quarter again.
After about 10 minutes the pancetta will have released some lovely fats full of flavour. Add the veg, chilli flakes, and oregano, drizzle in olive oil and combine with the pancetta and fats.
Return to the oven to roast for another 10 minutes while you prep the white sauce, or besciamella.
Melt the butter in a pan, add the flour and whisk to form a roux. Add half the milk and continue to whisk on a medium heat, as it starts to thicken add the remaining milk.
Season with salt and pepper, and you can add fresh grated nutmeg too. Put to one side.
Once your veg is roasted, add your gnocchi and half the passata, combine together to everything is well mixed and coated in sauce. Then top with the passata, you might not need it all just make sure all the gnocchi is covered but not brimming over.
- Then top with your white sauce and tear the mozzarella up and dot across the top. Season with pepper.
- Turn the heat up on the oven to 200 degrees and return to the oven for 10 minutes until bubbling and browned on top.


Easy Baked Conchiglioni with Bolognese Sauce
A really simple dinner recipe that doesn’t compromise on taste. Using Garofalo Pasta and Sauce
I love making my dishes from scratch using good, simple ingredients. Sometimes I also just want an easy dinner that doesn’t compromise on flavour or quality. Using Garofalo’s Bolognese Sauce paired with their Conchiglioni is the perfect way to make a great tasting, easy dinner using all natural ingredients.
The Conchiglioni is perfect for stuffing and Garofalo’s Bolognese sauce doesn’t contain any artificial flavours or preservatives. It’s made with fresh ripe tomatoes, beef, pork, extra virgin olive oil, onions, carrots, and Parmigiano Reggiano.
I made a simple white, or besciamella, sauce while the pasta cooked and then combined them all together, and topped with torn mozzarella.
You can watch the whole process on reels over on my Instagram @CookingCarafes.

Easy baked Conchiglioni with Bolognese Sauce
Prep time: 15 minutes | Cook time: 20 minutes | Serves: 3
Ingredients
- 180g Garofalo Conchiglioni Pasta
- 310g of Garofalo Bolognese Sauce
- 2 tablespoons of olive oil or 25g butter
- 25g flour
- 250ml milk
- 1 ball of mozzarella
- Fresh basil
Instructions
- Preheat the oven to 190 degrees (fan oven)
Bring a pan of water to the boil, salt your water and add your pasta.
Cook the pasta for 13 minutes (3 minutes short of the recommended cooking time)
While the pasta is cooking, heat the olive oil or butter in a pan and once warm or melted, stir in the flour with a whisk to create a roux. Stir quickly with the butter to create a golden mixture and add half the cold milk.
Whisk together on a medium heat and then add the rest of the milk. Keep stirring with the whisk. Season with salt, pepper and a little grated nutmeg if you have some.
Once it has begun to thicken turn off the heat. Line the base of an oven dish with the sauce. Reserve a tablespoon to top some of the shells with.
Once the shells are cooked, drain and using a slotted spoon gently lift them out one by one and to the dish with the open shell side up.
Add a teaspoon of sauce to each shell so it fills it.
Once complete, dot the leftover white sauce on top, and tear the mozzarella ball into various sized pieces and decorate the top, try to pick area where the shells are peaking out and sticking together.
Season with black pepper and you can always add some grated parmesan or hard cheese on top.
Place in the oven for 15-20 minutes until browned on top and bubbling.
Decorate with fresh basil if you wish.


Malloreddus alla Campidanese
Create this traditional Sardinian pasta dish using Gnocchi Sardi from Garofalo.
This is a truly traditional Sardinian dish, you'll find it on restaurant menus on the island. I remember eating this dish on lots of occasions with friends in Pula, and not least with my neighbour Angioletta and her husband. They used to invite me for lunch before the whole town took a siesta.
If you want to bring a taste of Sardinia into your kitchen at home, follow the recipe below.
Malloreddus alla campidanese
Prep time: 5 minutes | Cook time: 30 minutes | Serves: 2-3
Ingredients:
- 1 onion, finely chopped
- 2 pork sausages, skins removed
- 1 tbsp tomato puree
- 1 tsp of crushed fennel seeds
- 1 tbsp of freshly chopped rosemary
- 400g chopped tinned tomatoes
- 200g Gnocchi Sardia pasta, available form Garofalo, including Gluten Free.
- Pecorino, or parmesan or alternative hard cheese
- Olive Oil
Instructions:
- Gently heat the oil in a large frying pan and add the finely chopped onion, and cook on a low heat until soft.
- Meanwhile skin the sausages so you only have the meat, then add this to the pan, along with the fennel and rosemary. Mix with a wooden spoon to break down the meat and brown.
- Add the tomato puree and stir into the sausage meat, then add 400g of chopped tomatoes. Rinse the tomato can out with a splash of water and add to the sauce. Season with salt and pepper.
- Allow the sauce to simmer gently for about 20-25 minutes, if it starts to look a little dry add a splash of pasta water.
- While the sauce is simmering bring a pan of water to the boil for the pasta. Add a pinch of salt and cook the pasta - you can also make this from scratch using semolina or water. Alternatively Garofalo have gnochetti sardi in their range.
- Once you're happy with your sauce, it should have thickened but remain silky. Add the pasta to the sauce and stir it in, along with some Pecorino stirred through.
- Now it's time to serve, with an extra topping of Pecorino cheese, this dish would also go beautifully with a bottle of Cannonau if you can get your hands on this Sardinian wine that matches perfectly with the deep flavours of the sauce and the sausage.


Italian Style Sausage Casserole
You can’t beat a homemade casserole, and this Italian inspired sausage version is a weeknight winner for a tasty dinner.
A quick and easy casserole for weeknight meals and home comfort. Combine tasty veg cooked in Extra Virgin Olive Oil from Filippo Berio, with cannellini beans, quality chopped tomatoes and sausages of your choice for this tasty, fuss free, rustic dinner.
Pair it with thick, crunchy fresh bread or why not try adding my rosemary roasted potatoes.

Italian Style Sausage Casserole with Filippo Berio
Prep time: 5 minutes | Cook time: 30 minutes | Serves: 2-3 | Nutrition: 649 calories per serving
Ingredients
- 1 onion, finely chopped
- 1 carrot, sliced and quartered
- 1 courgette, sliced and quartered
- 100g Spinach (fresh or frozen), you can also use cavolo nero or kale
- 400g cannellini beans, again you could use borlotti beans or chick peas
- 400g chopped tinned tomatoes
- 3 - 4 sausages of your choice - I use traditional pork sausages, but you can substitute these for vegan/veggie/gluten free sausages,
- 1tsp oregano or alternative dried or fresh herbs, like rosemary or thyme
- Chilli flakes if you like a little heat or fresh chilli
- Salt & Pepper
- Filippo Berio Extra Virgin Olive Oil
Method
I cook my sausages separately in the oven so I can be getting on with the rest of the dish, I cook mine in the oven initially for 25 minutes. Depending on the sausages you are using, cook to instruction while you prep ingredients and dish.
Add 2tbsp of Filippo Berio Extra Virgin Olive Oil to your pan (you need a large flat based pan or casserole style dish for the hob), add your onion and carrot, and season with a little salt.
Cook on a low heat for 5 minutes until the onions are softened and translucent, then add your courgette, oregano or dried herbs and chilli flakes if adding cook for a further five minutes.
Add your chopped tomatoes and allow to simmer. Once your sausages are cooked, slice them into thick pieces and add to your casserole dish and combine. Season with salt and pepper.
Now add your cannellini beans and stir. Add your fresh spinach on top and allow it to steam and cook down into the sauce.
Once your sauce has thickened and is nice and chunky, my top tip is give it a taste test! Then drizzle it in Filippo Berio Extra Virgin Olive Oil.
Serve it up with my Rosemary Roasted Potatoes or thick, crusty bread to mop up the sauce – delicious!
This recipe is from my series of Cook Along and is part of a paid collaboration with Filippo Berio.
We’d love to see if you recreate any of our dishes so please tag @FilippoBerio_UK, @CookingCarafes
Find out more about Filippo Berio
You might also like these recipes


Nduja Chicken and Mushroom Orzo
This will become a weeknight favourite, ready in 40 minutes and a one pot dish - what’s not to like?
I’ve been experimenting with this recipe for a while. I love nduja, and I like finding new ways of adding its powerful Calabrian kick to dishes. This is such an easy one pot dish for a weeknight meal or serving up for friends.
Garofalo Orzo is the perfect match for this dish, cooked in stock with the nduja it soaks up all the delicious flavours. Orzo is often used in soups and stock based dishes due to its quick cooking time and versatility for dishes.
I cook everything all together without removing the chicken from the pan but if you find it easier you can remove it, just ensure sure your chicken is cooked through, and juices run clear before serving.

Nduja chicken and Mushroom Orzo with Garofalo
Prep time: 5 minutes | Cook time: 40 minutes | Serves: 2-3 | Nutrition: 651 calories per serving
Ingredients
- 180g – 200g Garofalo Orzo
- ½ Onion, finely chopped
- 1 Carrot, finely chopped
- 1 Celery stick, finely chopped
- 100g Mushrooms, sliced
- 6 Chicken thighs (skinless & boneless)
- 200g Passata
- 500ml Chicken stock
- 30g Nduja / 2tbsp nduja pasta/pesto
- Olive Oil
- Salt and pepper
- 1tbsp plain flour
Method
- Heat some olive oil in a pan, if your chicken thighs are particularly large I would cut in half to make it easier, dust them with flour and cook on a high heat for five minutes, regularly turning. Lower the heat and cook for a further five minutes, or until browned all over.
- Temporarily remove the pan from the heat, add the onions, carrot, celery and mushrooms and a little more olive oil, and a splash of water or stock. Season with salt and pepper. Then return to the low heat and cook for a further 5 minutes with the chicken. If you find it easier you can remove the chicken while you cook the vegetables and combine the orzo but I find it’s fine all in one pan.
- Add the nduja and allow to soften, then add the orzo and a little bit of stock to allow all the flavours to combine together.
- Add the passata and remaining stock, stir.
- Cover with a lid and allow to cook for 20 – 25 minutes on a low heat, stirring occasionally to ensure it doesn’t stick.
- If it starts to look too dry add some more water while the orzo continues to cook. You want a nice smooth consistency so you don’t want the orzo to absorb all the sauce.
- Serve and garnish with fresh parsley.
Other Recipes you might like


The Perfect Easy Risotto with Riso Gallo
Make an easy risotto with Riso Gallo, I’ve shared one of my favourite recipes but you can switch up the ingredients to suit you!
I cooked up a risotto with my lovely guests as part of my Easy Risotto Cook Along with Riso Gallo. I made it versatile so people could add ingredients they had at home. We used Carnaroli as it’s a great choice for using different ingredients, and has a slightly higher starch content than arborio so leave a gorgeous creamy finish and the perfect al dente bite.
I chose to make pancetta and porcini mushroom risotto – one of my favourites! So the ingredients list you’ll see is for that, but I explain in the method when to add different ingredients so feel free to get creative with your dishes.
If you’re looking for even more risotto ideas use the recipe finder over on risogallo.co.uk or be inspired by budding young chefs at youngrisottochef.co.uk

Pancetta and Porcini Mushroom Risotto using Riso Gallo Carnaroli
Pancetta and Porcini Mushroom Risotto with Riso Gallo
Prep time: 5 minutes | Cook time: 20 minutes | Serves: 3-4 (or two with leftovers) | Nutrition: 510 calories per serving
Ingredients
- 300g of Carnaroli Riso Gallo
- 1 small onion, finely chopped
- 1 small carrot, finely chopped
- 1 stick of celery, finely chopped
- 75g diced pancetta / bacon lardons or bacon
- 50g chestnut mushrooms, sliced
- Glass of white wine
- 20g porcini mushrooms, soaked and roughly chopped
- 1 litre of vegetable or chicken stock
- 1 tsp oregano
- 30g Butter
- 30g Parmesan, or alternative hard cheese
- Olive Oil
Method
Traditionally a risotto starts with butter, but because I’m adding pancetta I cook this off first and the fat from the pancetta helps flavour the risotto as it cooks, so I begin with pancetta in the pan on a medium heat for a few minutes.
When the fat is released add your soffritto ingredients of onion, carrot and celery. If you’re not using pancetta begin with 25g of butter or a good glug (1-2tbsp) of olive oil for your soffritto. You don’t have to use all three ingredients, you can just use onion or you can substitute celery for leek, or fennel, it’s up to you and with more confidence you can decide how you prefer your risotto. I also add oregano and season with salt at this point.
Once your soffritto has started to soften, add any other veg your including in your dish, so for me this was my chestnut mushrooms. If you’re adding anything that is pre-cooked like chicken, prawns or porcini, we will stir these in five minutes before the end, along with anything such as frozen peas or fresh spinach.
Once your veg has started to soften, increase the heat a little and add your risotto rice, we want to toast it a little and coat it in the lovely butter or olive oil from the pan, you can always add a little extra if needed. Don’t let the rice stick, keep it moving!
Next up, add your glass of white wine (or vermouth), alternatively add splash of stock and stir the rice until all the liquid is absorbed.
Then add about 200ml or a ladelful of hot stock to the pan and continue to stir, until all the liquid is absorbed, and again add 200ml of stock and keep doing this for about 10 - 12 minutes. Season with salt and pepper.
Then add any of your ingredients like porcini mushrooms, chicken, prawns, frozen pes, spinach etc and continue to cook for a final 5-8 minutes until the rice is cooked al dente and you still have a little stock remaining with the rice. Taste and season if necessary.
Then add your grated parmesan and some butter (or olive oil if vegan), give a good stir, and place a lid (or plate) over your pan and allow it to rest for two minutes. This is called the mantecare ‘to stir together’
Plate up, top with parmesan and enjoy!

More about Riso Gallo
Riso Gallo is one of the oldest rice-growing companies in Italy.Riso Gallo started out back in 1856 with a factory in Genoa that processed imported paddy rice.
They have been making Italians happy for six generations. Riso Gallo’s mission is to spread the culture of rice and risotto throughout the world by using innovation that constantly adapts to the needs of the modern consumer.
Even if recently more exotic varieties of rice such as black Venus rice have been used to make risotto, great traditional Italian risottos normally use three specific varieties of great white rices.
Riserva Gallo Arborio
Derived from the older Vialone variety in circa 1946, the heat gently penetrates its long grains during cooking preserving the right amount of starch inside to remain “al dente” yet giving creaminess, which is needed to make it perfectly smooth.
Riserva Gallo Carnaroli
This variety has also been obtained from a series of crosses in 1945 and since then it has quickly become a favourite of Italians who love risotto because of its amazing ability to maintain its shape and flavour, and to blend perfectly with all types of ingredients.
Sustainablility
Riso Gallo is the first international Italian rice brand to have undertaken the production of rice from sustainable agriculture, making their premium best-selling risotto rices - Gallo Risotto Tradition, Arborio, Carnaroli and Carnaroli Rustico - fully sustainable. Plus also now in packaging suitable for recycling.

Stelline Chicken Soup
Home comforts with this Stelline Chicken Soup. a great recipe to make the most of leftovers from roast chicken.
This chicken soup recipe with Garofalo Stelline pasta has become one of my favourite winter comfort foods. Enjoy for lunch or an easy, light dinner; both kids and adults will love this. Traditionally Stelline are served in brodo, which means broth or stock, on their own but I prefer adding some chicken and basic veg to make this even tastier.
It’s a great way to make the most of leftover chicken from a roast but you could also roast some chicken legs specifically for the recipe. I would recommend roasting them the day before so you can use the bones to make your own stock.
Stelline Chicken Soup with Garofalo
Prep time: 5 minutes | Cook time: 15 minutes | Serves: 2-3 | Nutrition: 278 calorioes per portion (based on 3 servings)
Ingredients
- Leftover chicken from 2 chicken legs, approximately 175g chicken, shredded. It doesn’t matter if it’s less, this dish is about utilising leftovers
- 700ml chicken stock (homemade is best, see my tips below)
- 80g Garofalo Stelline (organic Garofalo stelline also available)
- 2 small carrots, sliced and quartered
- 2 sticks of celery, sliced and quartered
- 1 small onion / half a large onion, finely chopped
- 10g flour
- Olive Oil / 25g butter
- 1tbsp fresh parsley, finely chopped
- Wedge of lemon to serve
- Drizzle of double cream to serve (optional)
Method
Add 2tbsp of olive oil or 25g butter in a pan, add the onion, carrot and celery, season with a little salt, and on a low heat cover with a lid and stir occasionally. Cook for five minutes until they are softened, you don’t want them to burn.
Add the 10g flour and combine, then add your stock, season with pepper and bring to a simmer and allow to cook uncovered for 5 minutes.
Add the stelline, continue to simmer for another 5 minutes.
Add your shredded chicken meat to the pan, and stir in a 1tbsp freshly chopped parsley and cook for a further 2 minutes.
Serve with a wedge of fresh lemon to be squeezed into the dish – this really does make all the difference, and if you have any double cream stir in a drizzle – enjoy!
How to make your own homemade stock or broth
When you have a roast chicken or leg/thighs, shred the meat and add the bones to a large pan with vegetable ends such as carrots, celery. Quarter an onion, add a bay leaf, peppercorns and any herbs. Cover the bones in two litres of water and bring to a boil with the lid, simmer with the lid on for 45 minutes and a further 45 minutes – 1 hour with the lid removed until reduced. Strain through a fine sieve

This recipe is in collaboration with Garofalo Pasta as part of a paid for partnership.
More about Garofalo Pasta
Garofalo has been making pasta in Gragnano, a small town near Naples in Italy since 1789 and they have a huge amount of history, experience and passion for Pasta. Today they combine artisan knowledge with modern technology to make what they consider the best possible pasta.
Garofalo is a premium Italian Wheat pasta made with only two ingredients, wheat and water. You can’t produce excellent pasta if the best wheat is not used. They only choose wheat that, in addition to a specific gluten level, offers a particular colour, cleanliness and flavour characteristics. These are essential to give Pasta Garofalo its distinctive character.
Within their wheat pasta ranges are traditional wheat pasta, organic whole wheat pasta and organic traditional wheat pasta. All Garofalo dry pasta sold in the UK is suitable for vegetarian and vegan diets, containing no egg, even the gluten free pasta ranges.

Creamy red pepper, prawn and chorizo Mafalda Corta with Garofalo
A Catalan twist to this pasta dish using Mafalda Corta from Garofalo. Combining red peppers, prawns and chorizo and a sweet and mild kick of paprika with a creamy finish.
This is a quick and easy mid week meal. A creamy tomato pasta with a subtle kick of paprika, with a flavoursome combo of red pepper, prawns and chorizo, Garofalo Mafalda Corta works beautifully with this sauce.
Creamy tomato, red pepper, prawn and chorizo Mafalda Corta with Garofalo
Prep time: 5 minutes | Cook time: 10 minutes | Serves: 2 | Nutrition: 653 calorioes per portion (based on 2 servings)
Ingredients
- 180g – 200g Garofalo Mafalda Corta
- 1 shallot, finely diced
- 100g cherry tomatoes, halved
- ½ red pepper (more if omitting the prawns or chorizo), cut into strips roughly 3cm by 1cm
- 75g chorizo, diced
- 75-100g cooked king prawns, roughly chopped
- 70g crème fraiche
- ½ lemon, zest and juice
- Fresh parsley, finely chopped
- 2 tbsp white wine (optional)
- 1 tsp of paprika
- 1 tsp dried herbs, like oregano or mixed Italian herbs
- 1 tbsp Olive Oil
- Salt
Method
Add a tbsp of olive oil to a large flat based pan and add your onion, red pepper, tomatoes. Season with salt and add your dried herbs.
Cook on a low heat for 5 minutes, stirring occasionally. While this is cooking, boil your pasta water, salt it and add the Garofalo Mafalda Corta.
Add your chorizo, paprika and chopped parsley to the pan, cook for one minute.
Add a splash of white wine or pasta water, then add your crème fraiche, lemon zest and juice and combine.
Add your prawns and continue to cook on a low heat while the pasta continues to cook until al dente (about 8 minutes). If the sauce starts to thicken too much add a splash of pasta water.
When the pasta is ready, drain and add to the sauce and stir together.
Serve and garnish with parsley

More about Garofalo Pasta
Garofalo has been making pasta in Gragnano, a small town near Naples in Italy since 1789 and they have a huge amount of history, experience and passion for Pasta. Today they combine artisan knowledge with modern technology to make what they consider the best possible pasta.
Garofalo is a premium Italian Wheat pasta made with only two ingredients, wheat and water. You can’t produce excellent pasta if the best wheat is not used. They only choose wheat that, in addition to a specific gluten level, offers a particular colour, cleanliness and flavour characteristics. These are essential to give Pasta Garofalo its distinctive character.
Garofalo pasta has a rough porous surface due to the dough passing through a bronze die to form each shape, allowing the sauce to stick and absorb into the cooked pasta for the perfect mouthful of pasta and sauce!
Within their wheat pasta ranges are traditional wheat pasta, organic whole wheat pasta and organic traditional wheat pasta. In addition, there’s an excellent gluten free range of pasta and a range of pasta shapes made with legumes and cereals which are perfect for anyone looking to maintain a healthy diet without compromising on taste, also gluten free.
All Garofalo dry pasta sold in the UK is suitable for vegetarian and vegan diets, containing no egg, even the gluten free pasta ranges.

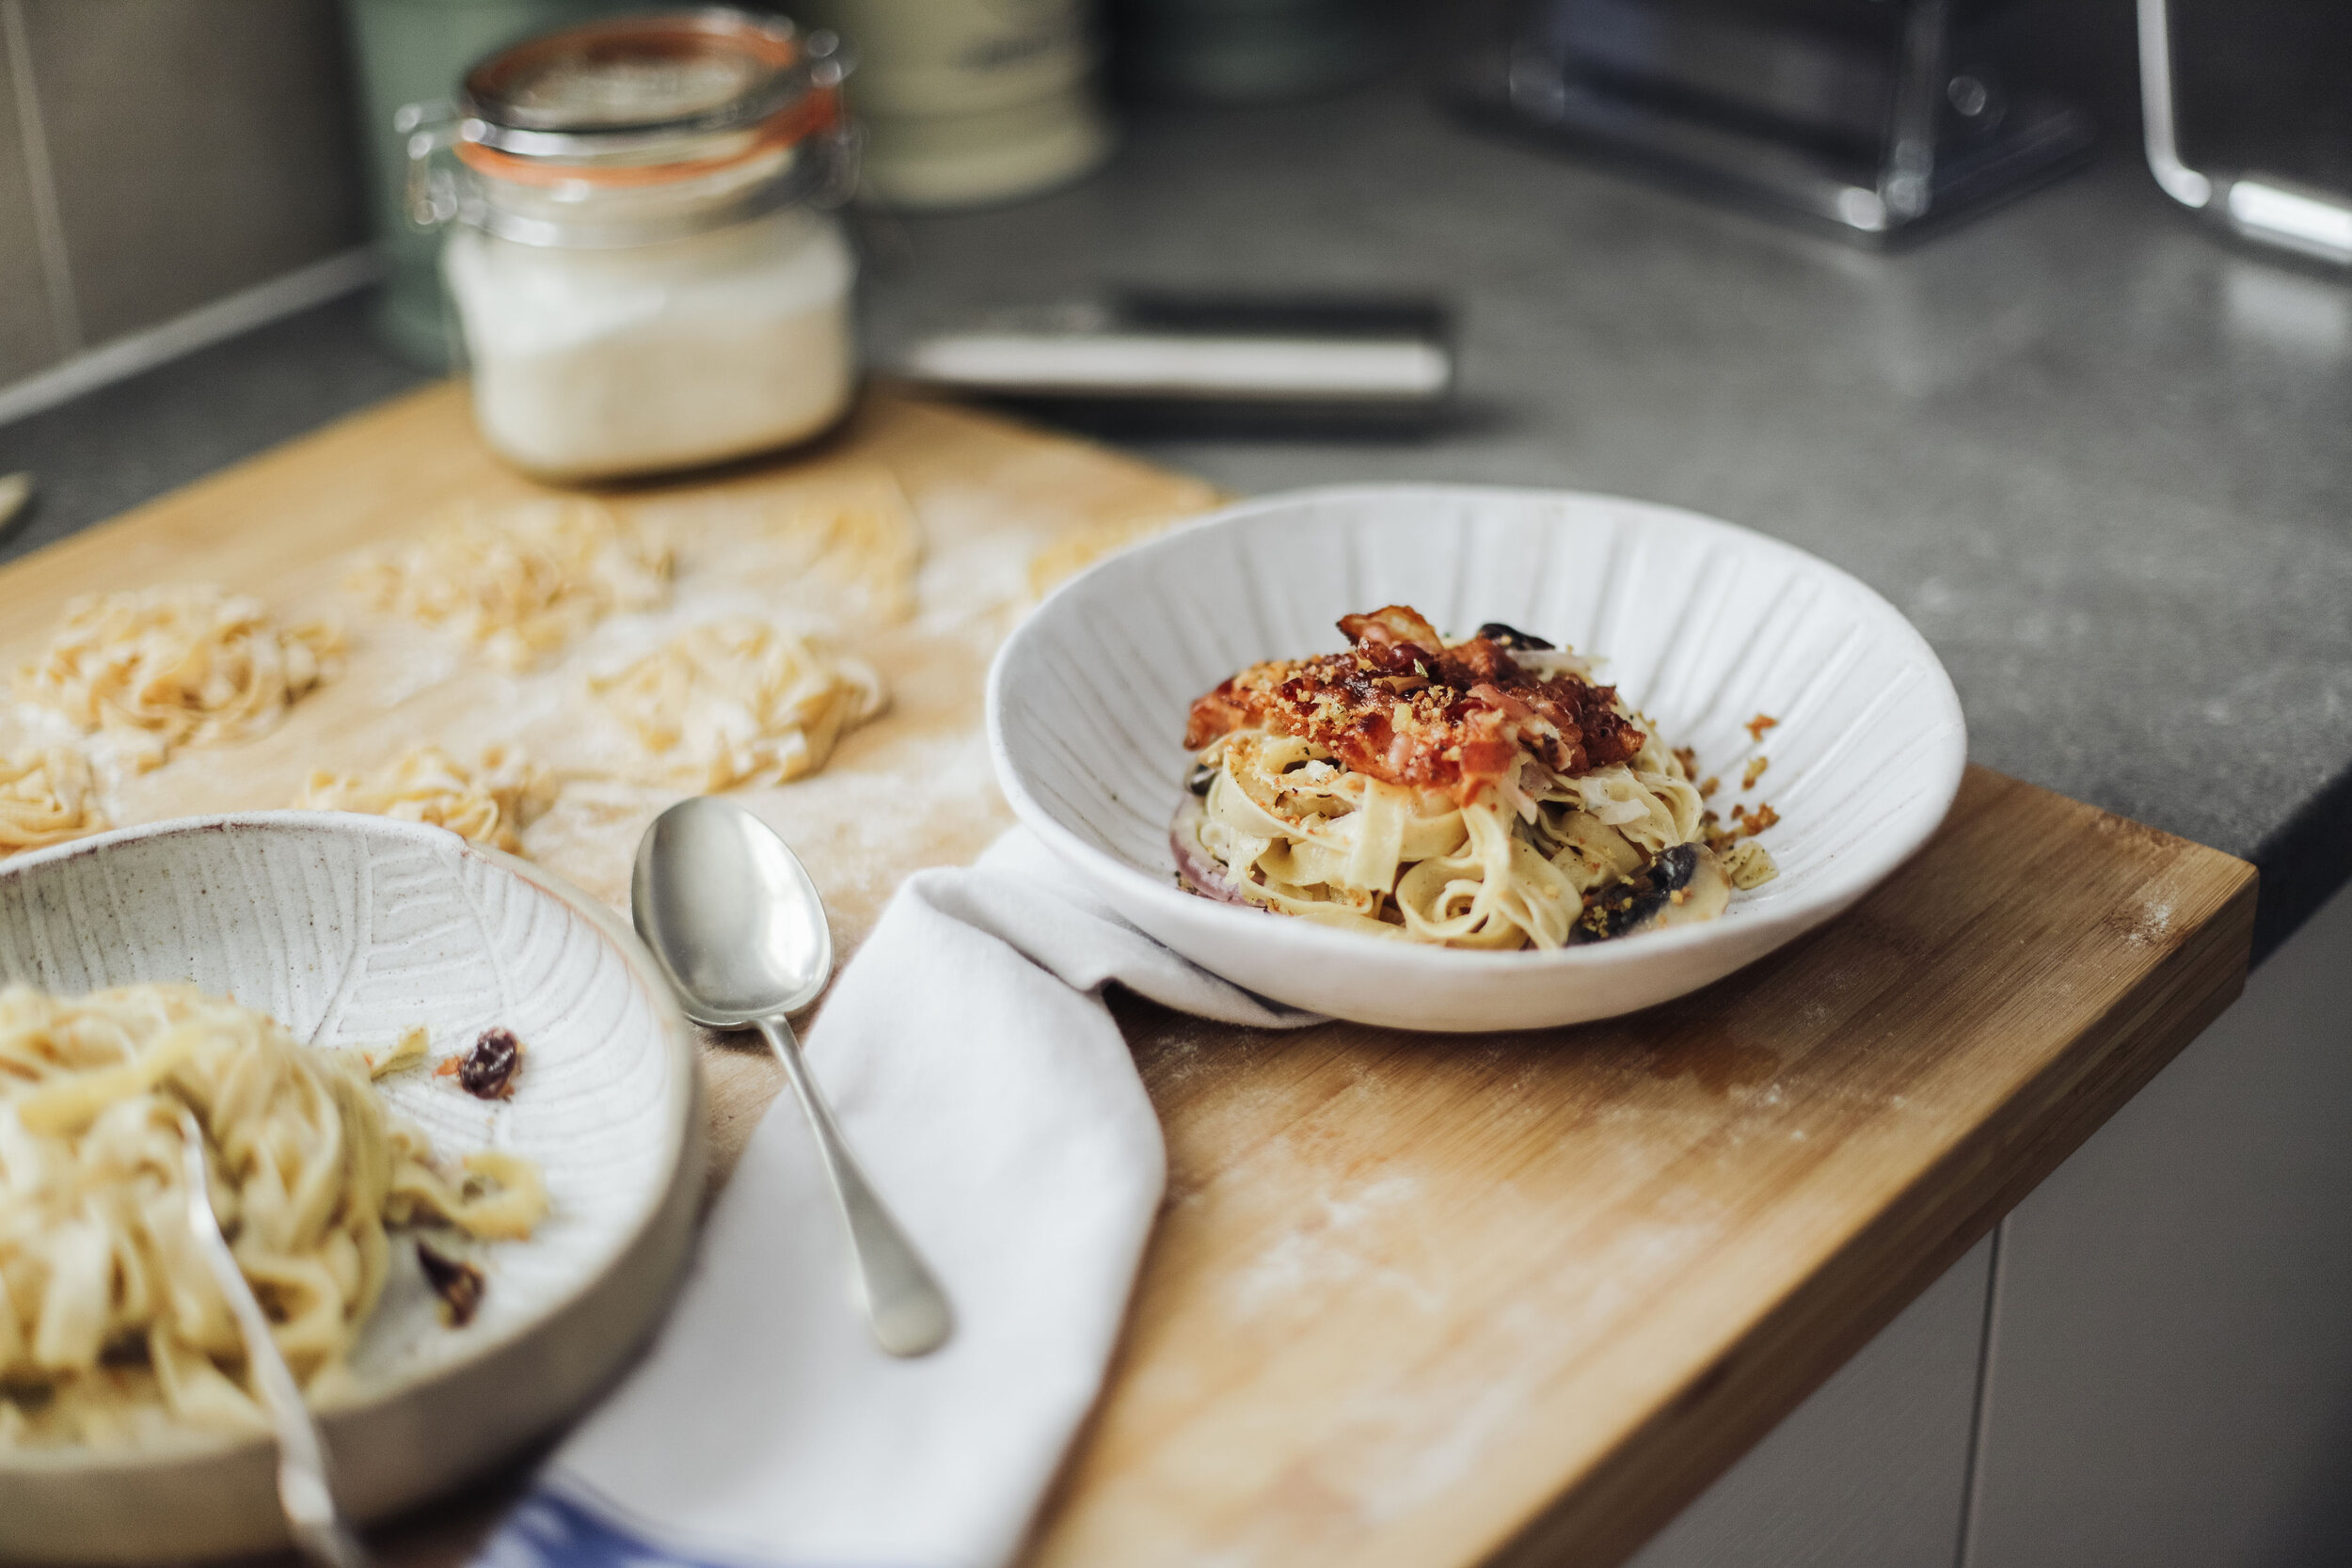
Taste of Christmas Tagliatelle
Bringing some festive vibes to your pasta dinners! This combination of creamy dolce latte cheese, chestnut mushrooms and crispy pancetta make a tasty treat for dinner.
This recipe was originally created for a feature with Kitchen Conversations. It was a festive inspired pasta dish, using some of the flavours and foods I love at Christmas, from soft, creamy blue cheese like dolce latte, to crispy pancetta and a twist of cranberry sauce!
Taste of Christmas Tagliatelle
Prep time: 10 minutes | Cook time: 10 minutes | Serves: 2 | Nutrition: 757 calories per serving
Ingredients
- 1/2 red onion, finely sliced
- 75g chestnut mushrooms (sliced)
- 75g dolce latte cheese cut roughly into pieces
- 150g - 175g tagliatelle (homemade tagliatelle tastes best!)
- 4 slices of pancetta
- 2 tbsps creme fraiche
- 100ml white wine (optional)
- 1 tsp cranberry sauce
- 2 tbsp breadcrumbs
- Extra virgin olive oil
Method
Pancetta and breadcrumbs If you want to save on washing up I recommend doing this at the start of the dish so you can use the same pan (drain any fat after cooking the pancetta), alternatively use a second frying pan and cook alongside the sauce, and pasta.
- Add a splash of olive oil in a pan and on a high heat, add the breadcrumbs and cook for 2 minutes until toasted (you can also add finely chopped rosemary or thyme). Put to one side in a small bowl.
- Fry the pancetta until crispy and place to one side on a plate.
Tagliatelle and sauce
- Bring a pan of water to the boil for the pasta (you can use dried, fresh or homemade!)
- Add 2 tbsps of olive oil to a pan on a low heat, add the finely sliced red onions and cook, gently moving around the pan for about 5 minutes, until soft.
- Add the mushrooms. Once they start to soften add the white wine (or a splash of pasta water) and allow to simmer for 2 minutes.
- On a low heat, add the dolce latte and creme fraiche to the pan, and stir to create a creamy sauce.
- Allow the sauce to gently simmer.
- While preparing the sauce, cook your pasta until al dente.
- Add 1 tsp of cranberry to the sauce and stir in. If you can get a cranberry sauce with orange, and/or port added to it, it will add that extra festive twist (Tracklements and Stokes do ones like these)
- Drain your pasta and add to the pan with the sauce, don’t worry if there is a little bit of pasta water still with the pasta, this will help make the sauce even creamer and cling to the pasta.
- Stir the pasta into the sauce, and plate up.
- Top with the pancetta and breadcrumbs for a delicious finishing touch.

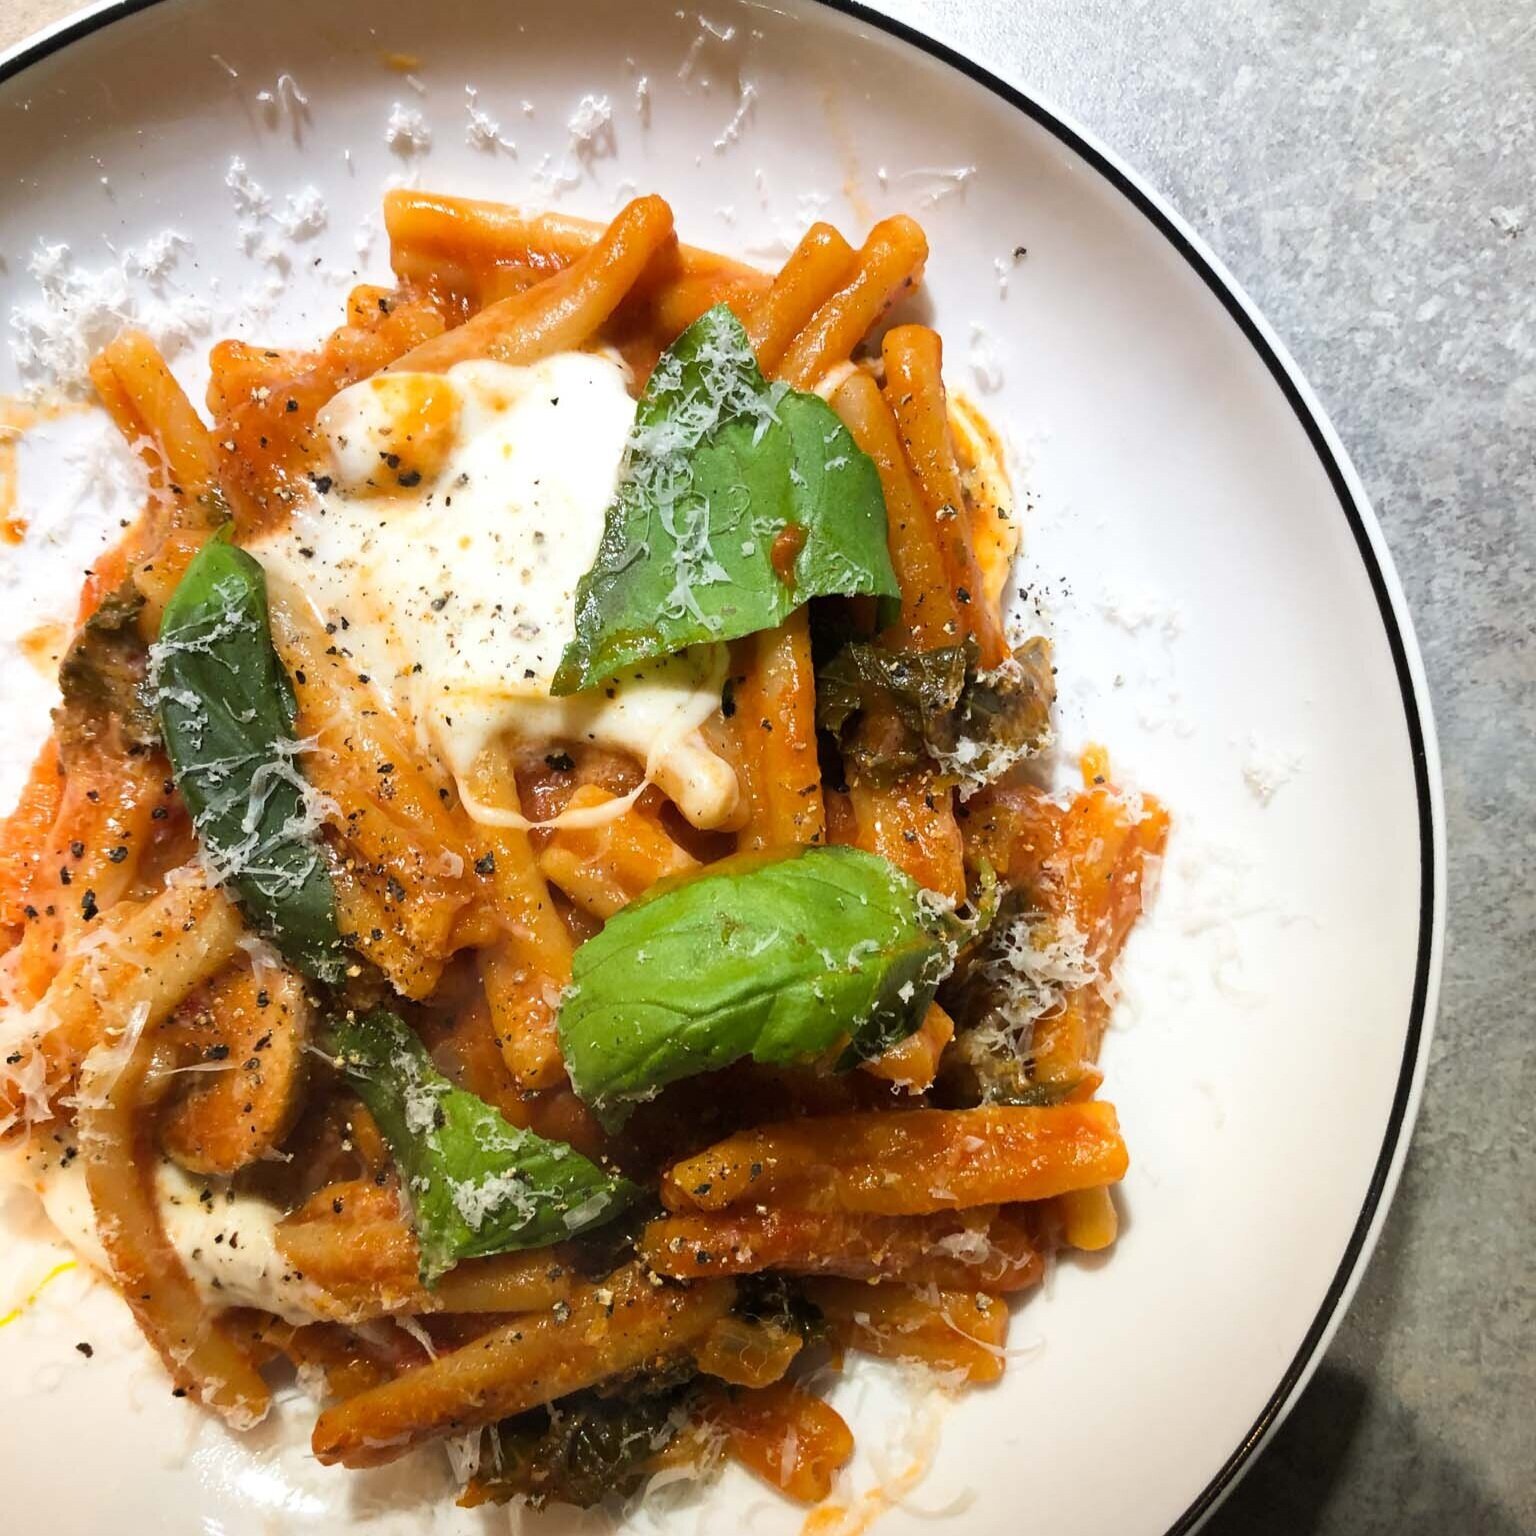
One Pot Pasta with Garofalo
This One Pot Pasta uses Garofalo Pasta Casarecce shape and combines fiery chilli with a tomato sauce to create a quick and easy dinner.
This easy recipe is perfect for a mid week meal with very little washing up! Using some simple ingredients and a kick of chilli, this fiery tomato sauce combines with Casarecce Pasta from Garofalo beautifully. Top with Mozzarella for a creamy, cheesy finish or use a vegan alternative.
This recipe can be made suitable for both vegans and vegetarians.
One Pot Pasta with Garofalo
Prep time: 10 minutes | Cook time: 20 minutes | Serves: 2-3 | Nutrition: 723 calorioes per portion (based on 2 servings)
Ingredients
- 200g Casarecce Garofalo Pasta
- 200g Passata
- 300ml chicken or vegetable stock
- 1 Onion
- 100g spinach or kale, chopped
- 1 small courgette or 60g mushrooms, quartered
- Olive Oil
- Chilli flakes / Fresh chilli / 15g nduja paste or 1 tbsp nduja pesto
- Dried herbs like Italian mixed, oregano, basil
- 1 ball of mozzarella cheese
Fresh basil
If you would like to add meat to this dish I would suggest two sausages, skinned
Method
Use a large casserole dish or saucepan suitable for the hob
Add a tablespoon of olive oil to the saucepan/casserole dish, and slowly cook the diced onion for five minutes, along with one red chilli, finely chopped, plus 1 tsp of dried herbs. If you’re adding sausages add these now.
Next add your chopped spinach/kale and courgette or mushrooms, and cook for a further 5 minutes.
Then add your chilli flakes or nduja, a splash of white wine(optional), stir
Add 200ml of passata, 300ml of chicken stock, add the pasta and stir. If you’re using mozzarella to top your pasta bake, reserve the water and you can also add this with the stock.
Bring to the boil, then reduce to a simmer put the lid on. Stirring occasionally. Cook for 10 minutes, if it starts to look a little dry add a splash of water.
Once the pasta is cooked al dente, turn off the heat and tear or slice the mozzarella on top. Replace the lid for a few minutes to allow it to start to slowly soften and melt into the sauce. Season with pepper, top with basil leaves and serve.
More about Garofalo Pasta
Garofalo has been making pasta in Gragnano, a small town near Naples in Italy since 1789 and they have a huge amount of history, experience and passion for Pasta. Today they combine artisan knowledge with modern technology to make what they consider the best possible pasta.
Garofalo is a premium Italian Wheat pasta made with only two ingredients, wheat and water. You can’t produce excellent pasta if the best wheat is not used. They only choose wheat that, in addition to a specific gluten level, offers a particular colour, cleanliness and flavour characteristics. These are essential to give Pasta Garofalo its distinctive character.
Garofalo pasta has a rough porous surface due to the dough passing through a bronze die to form each shape, allowing the sauce to stick and absorb into the cooked pasta for the perfect mouthful of pasta and sauce!
Within their wheat pasta ranges are traditional wheat pasta, organic whole wheat pasta and organic traditional wheat pasta. In addition, there’s an excellent gluten free range of pasta and a range of pasta shapes made with legumes and cereals which are perfect for anyone looking to maintain a healthy diet without compromising on taste, also gluten free.
All Garofalo dry pasta sold in the UK is suitable for vegetarian and vegan diets, containing no egg, even the gluten free pasta ranges.


Mac and Cheese
This mac and cheese recipe can really easily be adapted to add your own favourite ingredients, mix it up to include things you love or have at home, I’ve included my favourite suggestions.
This mac and cheese recipe can really easily be adapted to add your own favourite ingredients, which I’ve given options for in the ingredients. Mix it up to include things you love, or simple ingredients you have at home.
I’ve been making variations of macaroni cheese for years now, trialling different methods and variations of ingredients, but this is the winner for me. My favourite is using truffle oil, pancetta, porcini mushrooms and topping with coppa; it combines all of my favourites. I’m also a sucker for cauliflower cheese so sometimes I like to add this in too.

Make it your own Mac and Cheese
Prep time: 20 minutes | Cook time: 10-15 minutes | Serves: 3 - 4 | Nutrition: 629 calorioes per portion (based on 4 servings)
Ingredients
For the cheese sauce
- 1tbsp truffle oil or other flavoured oil (optional)
- 50g butter
- 50g flour
- 500ml milk
- 100g cheddar, grated
- Salt and pepper
For the pasta
- 250g macaroni or other short pasta
Optional ingredients
- 70g diced pancetta
- 100g mushrooms or 15g porcini mushrooms (soaked)
- Broccoli / Cauliflower / Spinach /
For finishing
- 25g breadcrumbs
- Coppa slices (optional) for finishing
- Parmesan for grating
- Fresh herbs like rosemary or thyme
Method
Pre-heat the oven to 180 degrees.
In an oven dish approx 15cm x 25cm, spread out the pancetta and allow to cook in the oven for five minutes. If you are adding fresh mushrooms, once some of the fat has started to come out, add the mushroom and give a stir in the juice and return to the oven for another 10 minutes while the pancetta continues to cook. Once the pancetta is browning remove from the oven.
While that is cooking, bring a large pan of water to the boil. Salt the water and add your pasta. If you’re adding cauliflower of broccoli, add small florets to the pasta water and cook all together. If you’re using fresh spinach, steam this over the pasta at the same time.
While the pasta is cooking, on a low heat melt the butter, add the truffle oil and then add the flour and quickly whisk to make a roux. It will turn into a buttery brown paste. Add half of the cold milk and whisk together and increase the heat a little. Keep adding a little milk and gently whisking, to allow the sauce to thicken. As it thickens, add the cheese and continue to stir until a consistency of double cream. Season with salt and pepper.
- When the pasta is al dente, drain the pasta (and any cauliflower/broccoli), try to reserve a little pasta water so you can easily move around the dish with the pancetta to combine.
If you have added cauliflower I recommend returning to the pasta pan first and mashing lightly with a masher before adding to the baking dish.
Add the pasta to the baking dish. If you’re using steamed spinach or porcini mushrooms, add these now.
Then pour over the cheese sauce and combine together.
Top with breadcrumbs, and I like to top with some coppa that will crisp up in the oven. Finally finish with a grating of parmesan and some fresh herbs.
Put into the oven for 10-15 minutes until browning on top, you can always increase the heat to 200 degrees for the last 5 minutes.
Serve with a simple side salad.


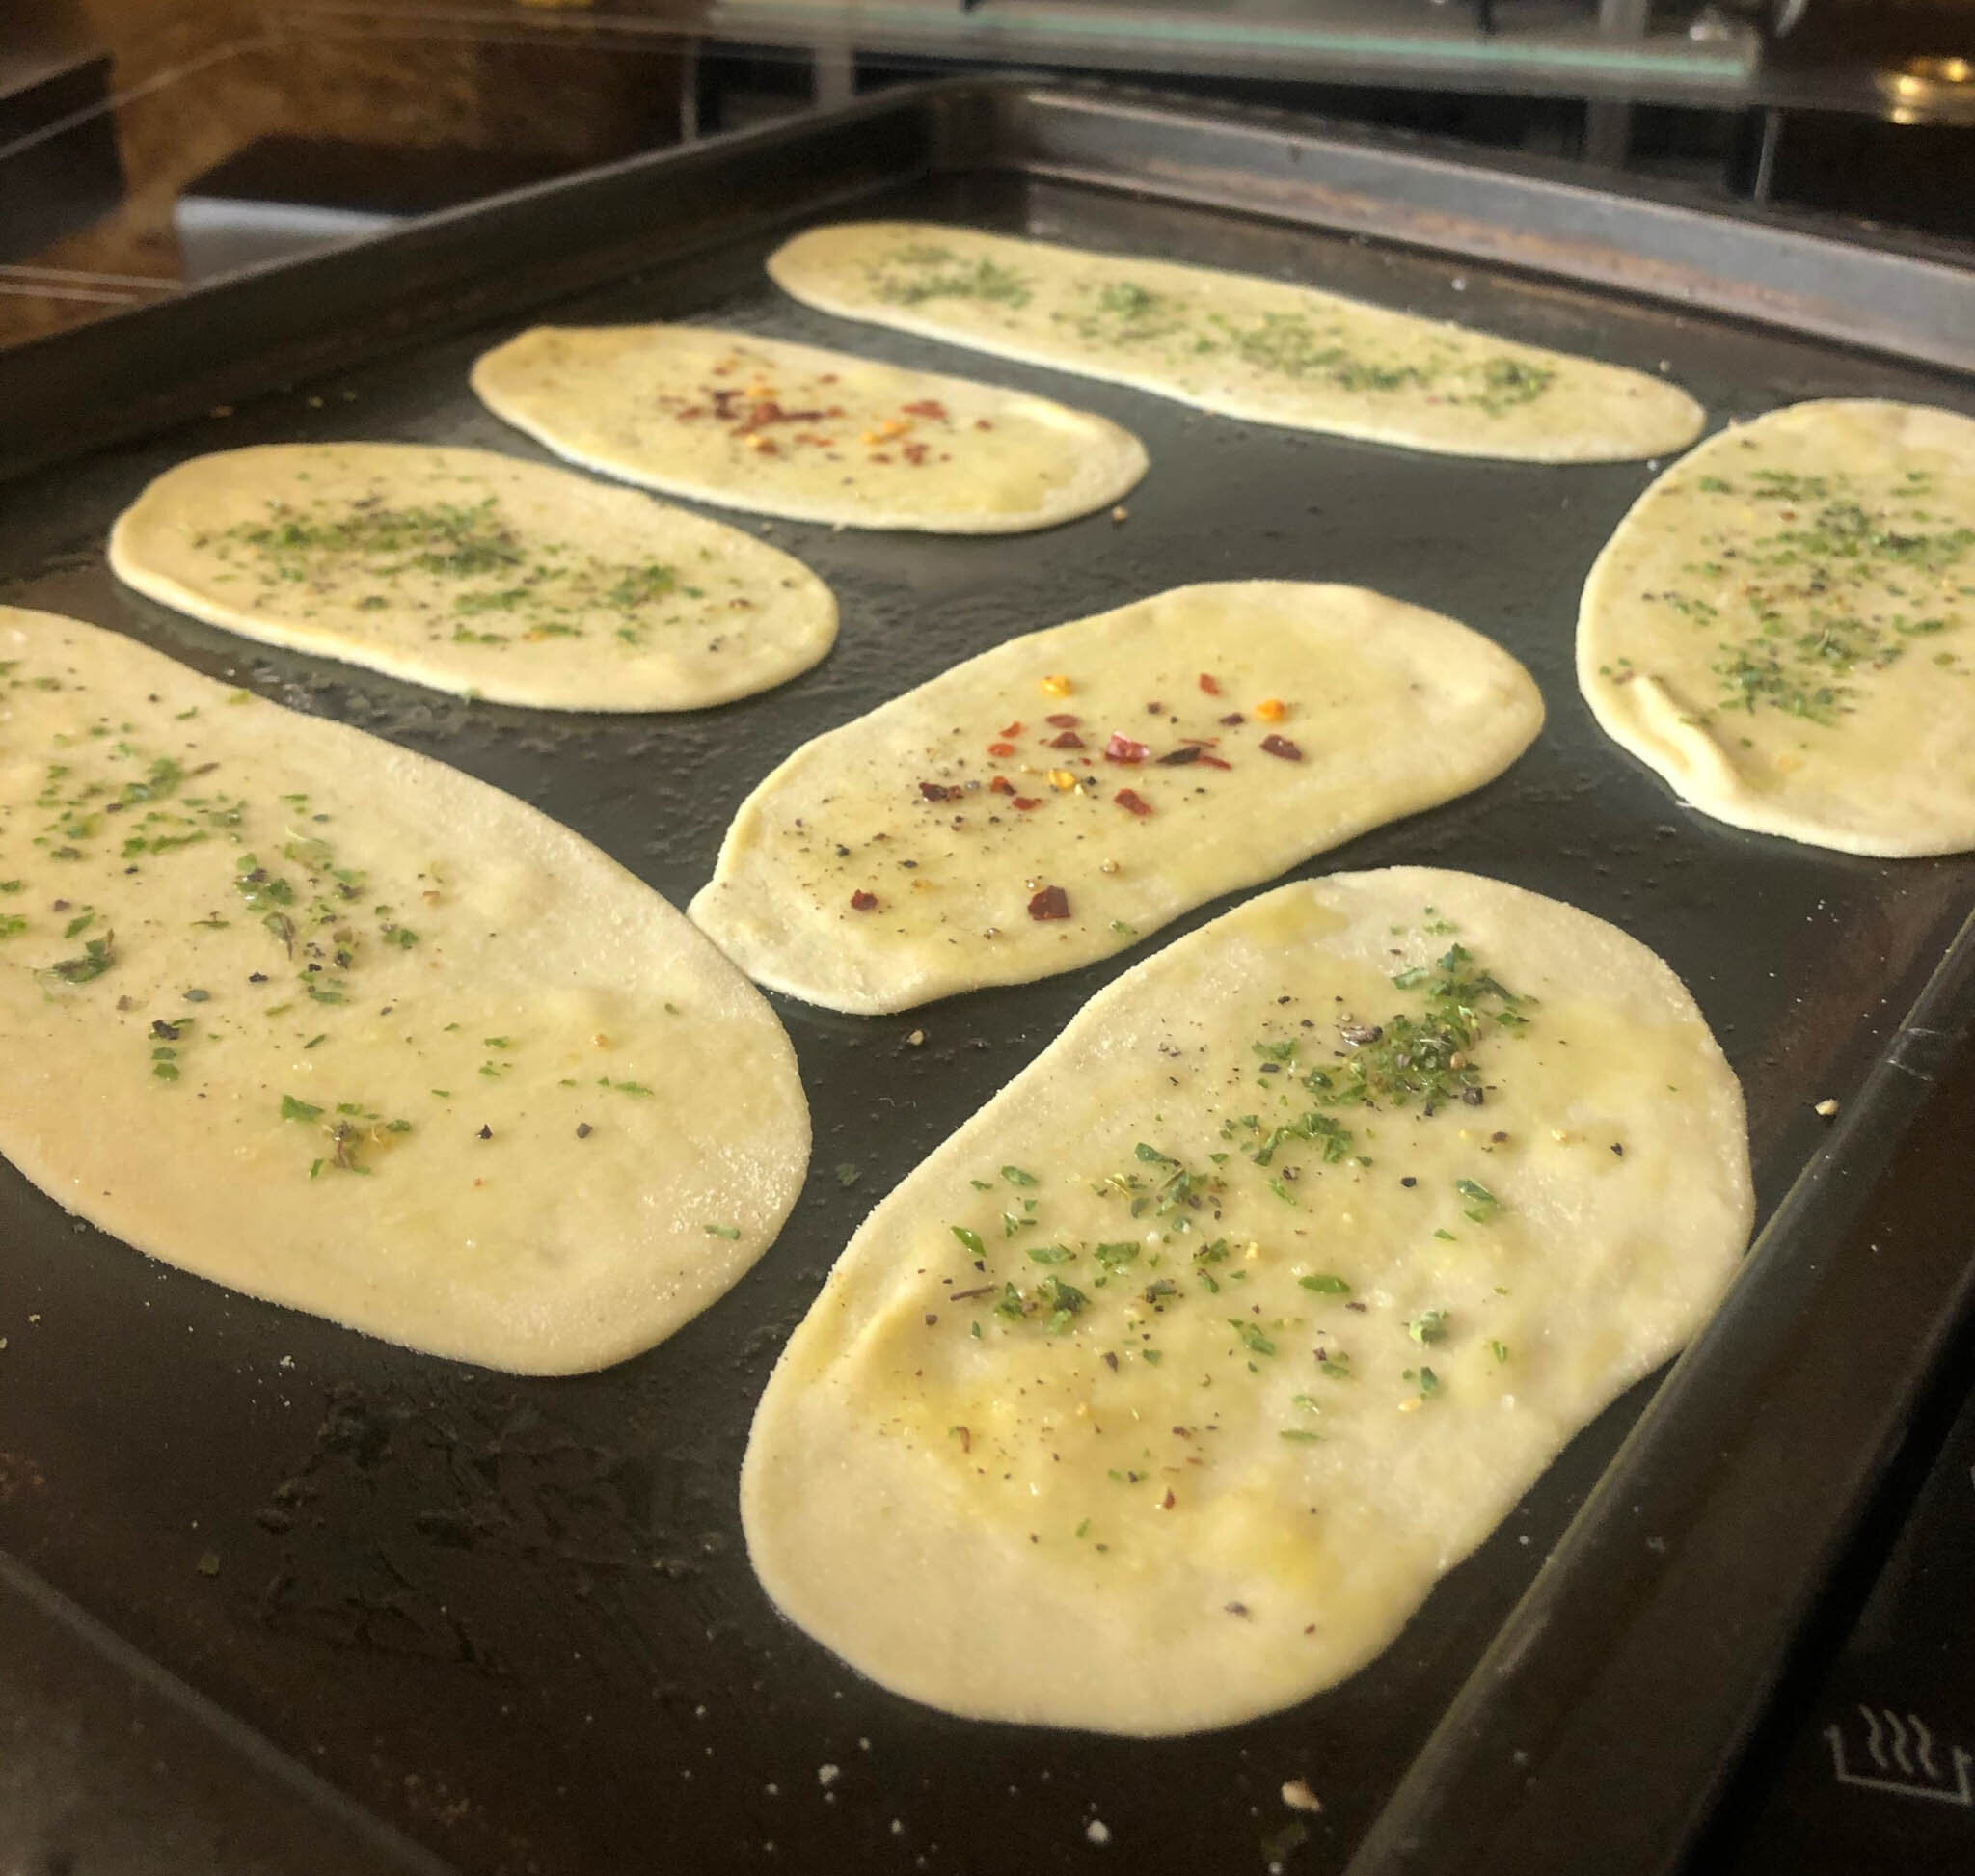
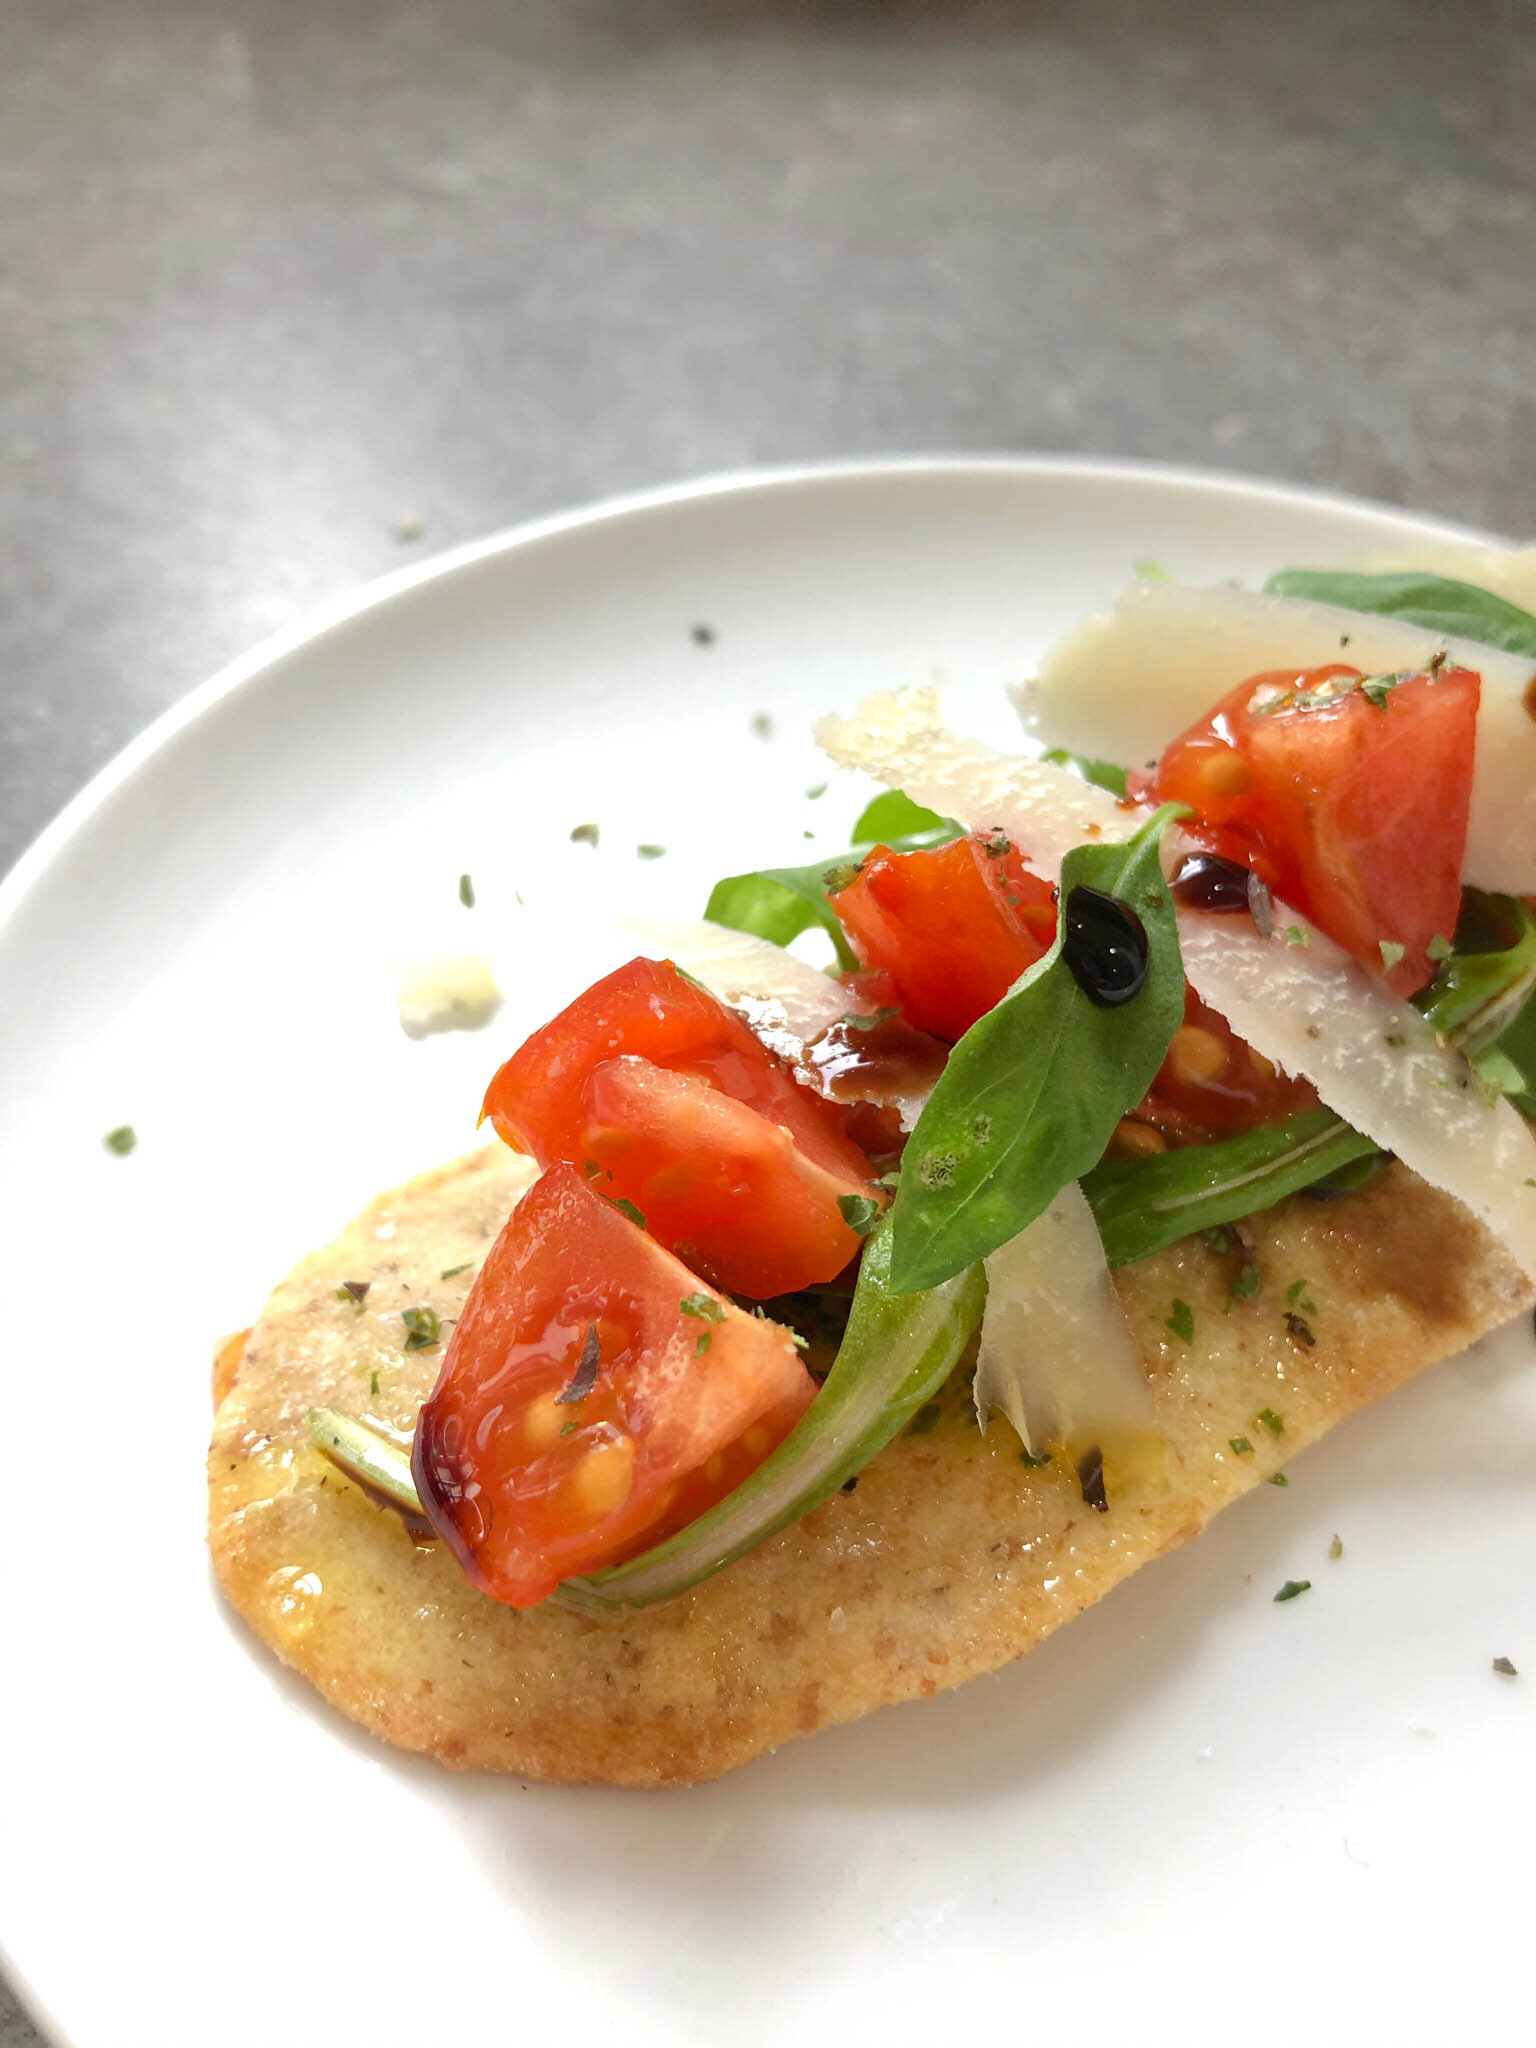
Italian Style Crispbreads
An Italian style crispbread, perfect for topping, dipping and snacking!
These tasty crispbreads make a great alternative to breadsticks, crackers or bread and are great for adding tasty toppings. They’re perfect for adding to a sharing platter or serving up as a snack or starter. They taste great on their own, with dips like black olive tapenade or with a topping like I have here.
Italian Style Crispbreds
Prep time: 10 minutes | Cook time: 6-8 minutes | Makes: 16 crispbreads / Serves 6 - 8 | Nutrition: 26 calories per crispbread
Ingredients
- 60g Strong Bread Flour (white, or 50/50)
- 60g semolina flour
- Pinch of salt
- 100ml luke warm water
- Dried herbs e.g. oregano or chilli flakes
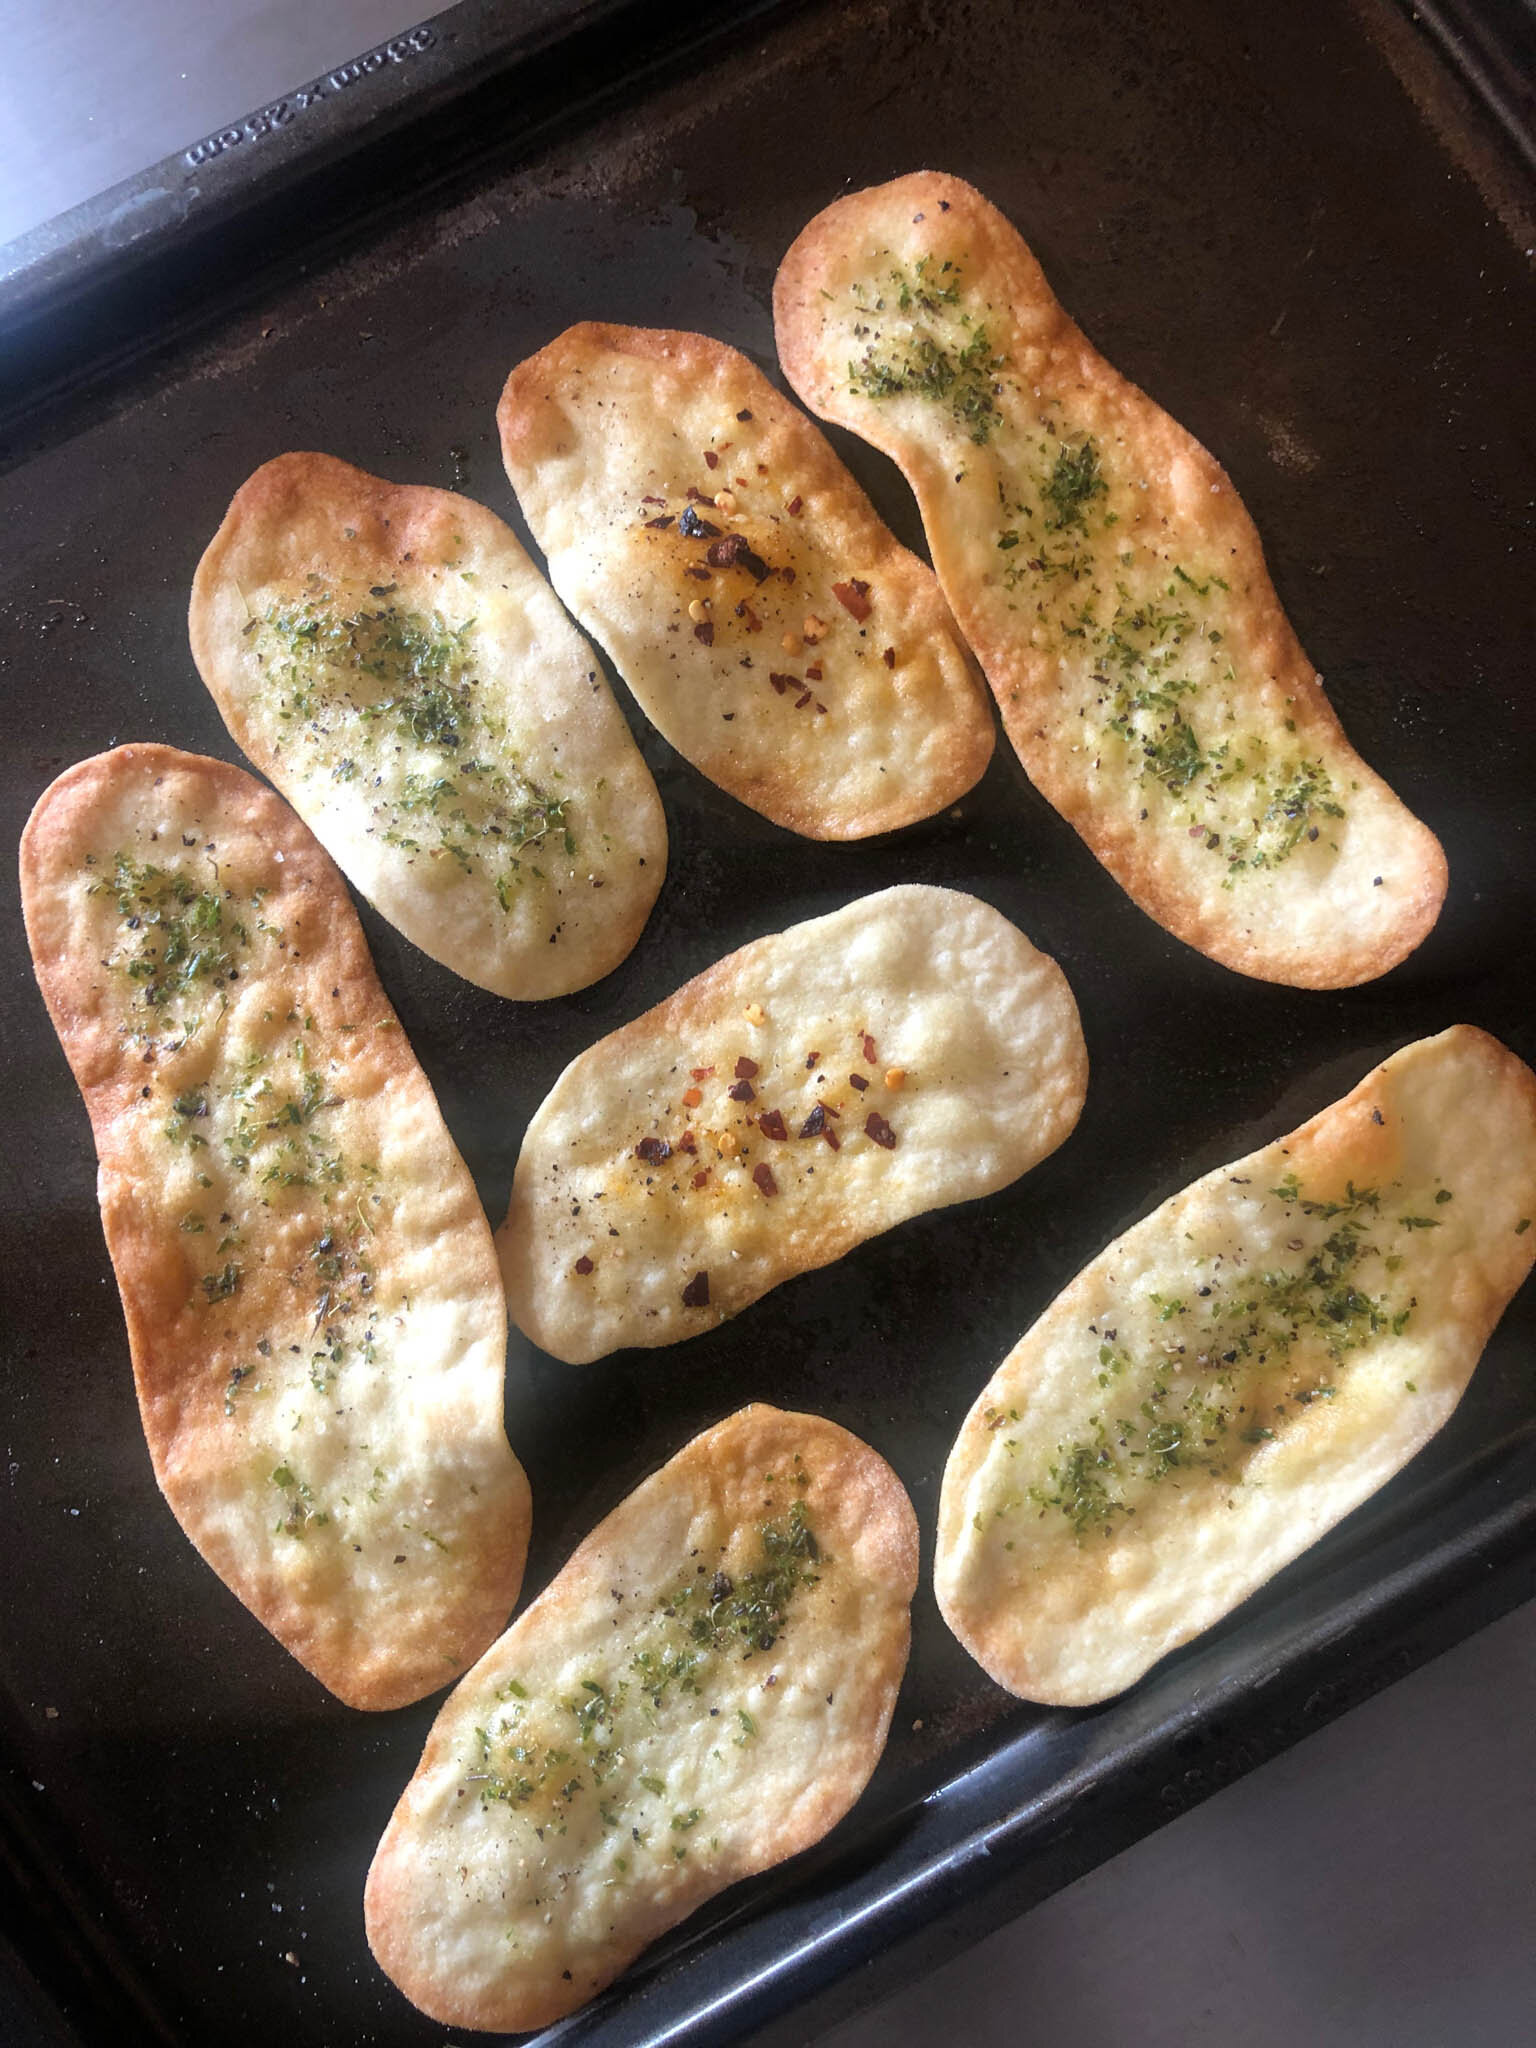
Method
- Pre-heat the oven to 200 degrees
- Combine the two flours and salt in a bowl and add the majority of the water. Bring the flour and water together to create a dough
- If needed add a little more water to combine all the flour
- Knead for five minutes until smooth
- Then cut off a small piece of dough, smaller than a golf ball, and flatten with your hand
- Then roll through a pasta machine or with a rolling pin into a rectangular shape about 0.5cm thick
- Place on a greased baking tray and brush the tops with extra virgin olive oil, and decorate with a little salt, dried herbs such as oregano or chilli flakes
- Bake for 6-8 mins until lightly browning and crisp
How to serve
Serve on their own or try topping with different ingredients. I’ve added a few chopped tomatoes, some rocket leaves, shavings of delicious 24 month aged Parmigiano Reggiano, a drizzle of balsamic vinegar and some basil leaves. You could also top with tomatoes and pesto, or what about some homemade caponata or tapenade. Get creative and add your favourites.


Bucatini and Meatballs
In the search for the perfect meatball, this recipe is tried and tested and makes a perfect oven baked meatball with tomato sauce. It’s a winner every time!
Bucatini & Meatballs
Prep time: 20 minutes | Cook time: 30 minutes | Makes: 16 meatballs / Serves 4 | Nutrition: 684 calories per serving
For the meatballs (makes 16)
You can freeze half the meatballs before cooking if you prefer and halve the pasta quantity for two people
- 200g beef mince
- 200g pork mince
- 35g breadcrumbs (soak in a little milk if particulalry coarse)
- 1tsp oregano
- 1tsp fennel seeds, coarsely crushed in a pestle and mortar (optional)
- 20g Parmesan, grated
- 1 large egg, beaten
- Salt and pepper
For the sauce
- ½ white onion, finely sliced
- Garlic clove, finely chopped
- ¼tsp Chilli flakes (optional)
- 400g Garofalo chopped tomatoes
- Olive Oil
For the pasta
Method
- Pre-heat the oven to 180 degrees
- In a bowl, add your mince, breadcrumbs, herbs, parmesan and salt and pepper. Lightly mix everything together using a fork or your hands.
- Then add your beaten egg and mix together again.
- With wet hands (or a little olive oil), roll the meatballs into medium sized balls (golf ball size) and place on a baking tray lined with baking parchment.
- The mixture should make approximately 16 meatballs so either cook them all or freeze half to use another time.
- Place the meatballs in the oven, on a middle shelf for 20 minutes. You don’t need to turn them.
- While the meatballs are cooking make your sauce, add a good glug of extra virgin olive oil to the pan (at least 2tbsps), add your onion, season with a little salt and cook on a low heat for five minutes.
- Then add your garlic and chilli flakes (if adding) and cook for a minute moving around the pan with a spoon before adding the tomatoes. Don’t forget to rinse the can with a little water and add to your sauce. If you have some parmesan rind in the fridge add this now too.
- Leave to simmer on a low heat while the meatballs cook, stirring occasionally.
- Bring a large pan of water to the boil, season with salt.
- Once the meatballs are ready, add the meatballs to the sauce and gently coat in the sauce. Leave on a low heat, stirring occasionally (add a splash of pasta water if it starts to dry up too much).
- Once you’ve added the meatballs cook your pasta until al dente.
- If the sauce looks ready, it should be nice and thick and clinging to the meatballs turn the heat off for the last 5 minutes while the pasta cooks and cover with a lid.
- Once the pasta is ready, for ease, I choose to remove the meatballs from the pan and place in a bowl while I coat the pasta in the sauce (don’t forget to remove the parmesan rind if you added it too!). Add the pasta to the pan and mix together so the pasta is coated in the lovely sauce.
- Serve the pasta into bowls, top with the meatballs and any excess sauce, and serve with grated parmesan.

More about Garofalo Pasta
Garofalo has been making paasta in Gragnano, a small town near Naples in Italy since 1789 and they have a huge amount of history, experience and passion for Pasta. Today they combine their artisan knowledge with modern technology to make what they consider the best possible pasta. Reviews show that their customers also recognise the premium quality of Garofalo pasta and make it their pasta of choice over other pasta brands due to the quality, range of products and diversity of shapes available.
What makes Garofalo so good
Their premium Italian Wheat pasta with only two ingredients, wheat and water. You can’t produce excellent pasta if the best wheat is not used. They only choose wheat that, in addition to a specific gluten level, offers a particular colour, cleanliness and flavour characteristics. These are essential to give Pasta Garofalo its distinctive character.
Garofalo pasta has a rough porous surface due to the dough passing through a bronze die to form each shape, allowing the sauce to stick and absorb into the cooked pasta for the perfect mouthful of pasta and sauce!
Within Garofalo wheat pasta ranges are traditional wheat pasta, organic whole wheat pasta and organic traditional wheat pasta. In addition, they have a gluten free range of pasta and a range of pasta shapes made with legumes and cereals which is perfect for anyone looking to maintain a healthy diet without compromising on taste, also gluten free.
All Garofalo dry pasta sold in the UK is suitable for vegetarian and vegan diets, containing no egg, even the gluten free pasta ranges.
Discover more about how we make Garofalo pasta and the precise choices we take in making our pasta.

Oven Baked Arancini
Oven baked arancini are a great alternative if you don’t want to fry your arancini. They’re still quite simple to make and taste great!
Arancini, this delightful snack that holds its place in Italian cuisine as Sicilian street food. A ball of risotto rice, seasoned and flavoured and stuffed with cheese, coated in breadcrumbs and traditionally deep fried.
Don’t get me wrong, traditional in this instance would always be my preferred option. As in straight from a street vendor or served up in a rustic trattoria with all the love and passion of an Italian poured into it. However, failing having either option on my doorstep I decided it was time I made some myself.
Great recipe for leftover risotto
I’ve been making extra risotto every time now so I can make arancini with the leftovers. I started by frying them, which gave an amazing true to style texture and finish but I’m not a fan of frying, and I don’t have a fryer so I decided surely I could make something equally delicious by oven baking them. After several attempts I have perfected the method which I will share with you here.
What type of risotto to use for arancini

Sausage and Tomato Risotto makes a great arancini
I have tried this with various risottos, from lemon and mascarpone to asparagus and pea, and sausage and tomato – all work in my opinion it just depends what your reference is, the key is to not make anything with large pieces of veg or meat in, you want a smooth finish. I’ve also tried different cheeses but mozzarella remains my favourite, you can’t beat the texture and flavour of mozzarella as it combines with the rice with the first mouthful you take.
Serve arancini as a snack or starter
And finally arancini can be served straight up as a finger food snack or as part of a sharing platter, but I also love serving them with a smooth tomato sauce as a starter.
There’s no real need for measurements, but this will easily be enough to finish 12 golf ball sized arancini, which is about 150 - 200g of cooked risotto.

Oven Baked Arancini
Prep time: 20 minutes | Cook time: 20 minutes | Makes: 12 | Nutrition: 136 calories per serving
Ingredients
- 50g breadcrumbs, I have been using Panko Breadcrumbs
- 2-3 tbsp of Filippo Berio Mild and Light Olive Oil
- 1 tbsp plain flour
- 1 egg, beaten
- 200g cooked risotto (follow my recipe for sausage and tomato which makes a delicious filling)
- ½ ball of Mozzarella, diced
Method
I recommend washing your hands, and leaving them wet for this process. Before you start have your flour and breadcrumbs on separate plates and your egg beaten in a small bowl.
Pour the Filippo Berio Light and Mild Olive Oil onto the breadcrumbs and toss together so they are coated in the oil. Start with 2tbsp and add a little more if required, it just needs to be a light dressing of oil on to coat them, you don’t want them swimming in oil.
Pre-heat the oven to 200 degrees (fan oven).
Using a teaspoon, take a tsp of risotto rice and place in the palm of your hand, loosely shape the base into a ball.
Place a piece of diced mozzarella in the middle and then take another teaspoon of cooked risotto and shape around the mozzarella, ensuring the mozzarella is pushed into the middle so the risotto surrounds.
With your wet hands, roll into a golf sized ball shape like you would a meatball (see video).
Then roll the risotto ball in the flour to give it a light dusting.
Dip the risotto ball into the beaten egg.
Finally, roll the risotto ball in the breadcrumbs and then place on a baking tray lined with baking parchment.
Repeat the process for each arancini. Once they are all made you can choose to refrigerate until you are ready to cook or put straight into the pre-heated oven for 20 minutes until golden brown, and crispy.
Leave to stand for a few minutes before serving, either on their own or with a tomato sauce.
Top tip: Make sure the mozzarella is firmly in the middle of the risotto, and surrounded by the rice otherwise it will ooze out of the filling.
For a smooth tomato sauce
This is one to make and then use the rest of the sauce for pasta or freeze for a later date:

1 onion, finely chopped
1 garlic clove, finely sliced
1 tsp dried herbs, basil, oregano, Italian mixed whatever you’ve got!
1 tin plum tomatoes
2 tbsp extra virgin olive oil
Add your oil to the pan and on a low heat cook your onions for at least 5 minutes until soft and translucent.
Add the garlic, and dried herbs, followed by your tomatoes.
Allow to simmer on a low heat for at least 15 minutes. Breaking up the tomatoes with the back of a spoon as they start to break down.
Remove from the heat and transfer the sauce to a blender. Blitz for 30 seconds until smooth. Add some fresh basil if you have some.
Add a tablespoon or two to a plate and place two arancini on top for a starter.
Save the rest of the sauce for a quick and easy pasta dinner, it can also be frozen.

Sausage and Tomato Risotto
This sausage and tomato risotto will be a crowd pleaser for the all the family. Plus leftovers make great arancini!
This risotto recipe is a melt in the mouth, bowl of comfort! Usually when I make risotto I go straight for my favourites; porcini mushroom, seafood or a light, lemony combo with spring and summer veg, but I decided to make something different for a change. This sausage and tomato risotto combines fennel and rosemary to pair with the pork sausage, and uses tinned tomatoes with stock for added flavour. I also thought this style of risotto would make a great base for my oven baked arancini.
This recipe makes enough for four people or serves 2 with enough spare for 10-12 arancini.
Sausage and Tomato Risotto
Prep time: 10 minutes | Cook time: 25 minutes | Serves: 4 | Nutrition: 561 calories per serving
Ingredients
- 350g arborio or carnaroli risotto rice
- 750ml chicken or vegetable stock
- 1 small glass of white wine (optional)
- 400g chopped tomatoes
- ½ red onion, finely chopped
- 2 pork sausages, skinned
- 1-2 tsp of fennel seeds, crushed (add to taste)
- 1 tbsp fresh rosemary, finely chopped
- Extra Virgin Olive Oil
- 50g butter
- Parmesan / pecorino
Instructions
Add two tablespoons of extra virgin olive oil in a large saucepan on a low heat and cook the onions for about 5 minutes until they are softening.
Next add your sausage, break it up as you add it to the pan and add the fennel and rosemary, and season with salt and pepper. Use the back of a wooden spoon to break the sausage into much smaller pieces, so as it cooks with the rice and stock it becomes more like ground mince. Cook for a further five minutes.
Once the sausage has started to lightly brown, add the risotto rice and stir to combine and coat the rice in the oil from the pan so it turns translucent.
If adding, add a glass of white wine (about 150ml). Stir the ingredient and once the wine has been absorbed, add a ladleful of stock along with a quarter of the tin of tomatoes.
Increase the heat a little and allow to cook while gently stirring as it simmers, with a gentle bubble.
Once all the stock and tomatoes are absorbed add two ladles of stock and a ¼ of the tin of tomatoes each time is absorbed, repeat this while stirring almost constantly.
This process should take about twenty minutes, you may need to add some more stock or water until the risotto is cooked to al dente - want it to have a little bite.
Remove from heat, add the cubed butter and grate a generous amount of hard cheese like parmesan or pecorino on top. Stir to combine and place a lid on the saucepan to allow everything to relax for a few minutes before serving.
Serve with a grating of hard cheese or if you’re feeling indulgent top with creamy burrata.


Broad bean and ricotta bruschetta
Perfect for summer, this broad bean bruschetta blends with ricotta, mint and lemon for a tasty appetiser, starter or lunch.
This makes a great alternative or to accompany a more traditional bruschetta of tomato. It’s a quick recipe to make and you can prep the broad bean and ricotta topping ahead of time, so all you need to do is toast the bread and serve when you’re ready.
The broad beans work perfectly with the zing and zest of the mint and lemon, and then blended with the ricotta for a creamy finish. Serve with a chilled Vermentino for the perfect aperitivo this summer.

Broad Bean and Ricotta Bruschetta
Prep time: 10 minutes | Serves: 4 | Nutrition: 184 calories per serving
Ingredients:
- 200g podded broad beans
- 125g ricotta (or top with crumbled feta instead)
- 1 tbsp olive oil
- Lemon juice and zest
- Fresh mint leaves, 10
- Ciabatta or sourdough slices
Instructions:
- Pod the broad beans and cook for a few minutes. I used frozen beans for ease.
- Using a mini food processor blend the beans with lemon zest and mint until you have a chunky mix.
- Add the ricotta along with a with splash of olive oil, and a squeeze of lemon juice (about half a small lemon). Blend until you have a creamy consistency.
- Beore toasting your bread, drizzle it in olive oil, season with salt and rub with a garlic clove. Grill until lightly browned. If you're using a toaster season with thh oil, salt and garlic after toasting.
- Spoon the broad bean mix onto the toast, you can always top with some rocket.


Caprese Salad
A simple caprese salad of tomato and mozzarella is the perfect answer to lunch on sunny days
This simple, classic Italian salad, insalata caprese, never disappoints on a sunny afternoon – whether it’s at home in your garden or al fresco in Italy.
Originating from Capri in Italy, hence its name Caprese and known for its famous tricolore colours (red, white and green) this simple salad served with a crusty piece of bread makes a great sharing platter for lunch.
Traditionally buffalo Mozzarella is used and thickly sliced but I also like this switching this up with some burrata, the creaminess with the tomatoes, olive and some bread is too good to miss!

Caprese salad
Prep time: 5 minutes | Serves: 2-3 | Nutrition: 334 calories per serving (based on two people sharing)
Ingredients
1 Ball of Buffalo Mozzarella or Burrata
2 large tomatoes
1 tsp dried oregano
Olive Oil
Basil leaves
Instructions
It’s best to serve the tomatoes and the mozzarella at room temperature rather than straight from the fridge as it intensifies the flavours.
Slice your tomatoes and mozzarella about 1.5cm thick, layer on a plate. If using burrata place in the middle and decorate the tomatoes around it. Or just before serving break open and tear onto the tomatoes with the creamy middle.
Drizzle with Extra Virgin Olive Oil, season with salt and dried oregano. Decorate with fresh basil and serve!
Serving suggestions
You can also add rocket, olives and although not traditional my family love to add avocado.
Serve with crusty bread for mopping up all the delicious oil at the end. Lots of people to like to drizzle over a good quality balsamic vinegar too, mix it up how you like!

Stuffed Pasta Shells | Spinach & Ricotta Lumaconi
Stuffed pasta shells nestled in a tomato sauce, this recipe is comfort food for all seasons.
This recipe for stuffed pasta shells makes the perfect lunch or dinner for all seasons. Serve it up with a side salad of rocket and tomato or on its own with warm crusty bread to mop up the tomato sauce.
I had a craving for these beautiful shells. I love the way they can be stuffed and then nestled snuggly into a tomato sauce. Where the sauces oozes into the gaps between and around the rims of the shells and are then baked with a layer of parmesan, and you get those crisp, crunchy bits of the shells poking out, you know like those crispy bits of lasagne that everyone wants!
Prep ahead
You can easily prep this dish ahead of time and just finish off in the oven when you’re ready to serve. Just follow the steps and before adding the grated parmesan, cover and leave to one side or place in the fridge (depending how long you’re leaving it for).

Stuffed Pasta Shells | Spinach & Ricotta Lumaconi
Prep time: 15 minutes | Cook time: 15-20 minutes | Serves: 3-4 | Nutrition: 486 calories per serving
Ingredients
- 250g Lumaconi pasta shells
- 250g Ricotta
- 70 – 100g spinach, finely chopped (wilt in a pan if fresh or if using frozen defrost and squeeze out the excess water)
- 700g of passata or two tins of chopped/plum tomatoes (400g each)
- 1-2 garlic cloves (to taste), finely sliced
- 40g parmesan
- Nutmeg
- Olive oil
- Salt and Pepper
- Fresh basil leaves
- 1/2 tsp chilli flakes (optional)
Instructions
Preheat a fan oven to 280 degrees
In a pan, add a good glug of olive oil, add your garlic on a low heat. If you want to add chilli flakes for a little heat, add these now too. As the garlic starts to sizzle in the pan add your tomatoes.
Allow to simmer on a low heat while you prepare the rest of the ingredients. Bring a pan of water to the boil and salt it, then add your lumaconi and cook for approximately 10 minutes so the pasta doesn’t lose its shape.
While the pasta is cooking mix your spinach, ricotta and 20g of grated parmesan to a bowl. Grate some whole nutmeg (about a quarter) into the mixture and season with salt. Mix together, and with a clean spoon have a taste to check your seasoning.
I use frozen spinach, so I defrost it, squeeze out any excess water and finely chop.
Once your pasta is ready, drain the pasta and leave it to cool in the colander. Turn the heat off the tomato sauce, tear in some fresh basil and then spread half of the sauce on the base of an oven dish.
Using a piping bag, or you can use a teaspoon, but from experience a piping bag is much easier! Gently fill each shell with a squeeze of the ricotta mixture and place in the oven dish nestled in the sauce.
Once you have filled them all, gently spoon over the rest of the sauce filling any gaps around the wholes and forming a little layer on top. Then top with grated parmesan. You could also add mozzarella or cheddar on top if you want it a little cheesier.
Place the dish in the oven for ten minutes, after ten minute you may want to add a little more cheese and then turn the oven up to 200degrees and bake for a further 5-10 minutes.
Serve on its own or with some nice chunky bread and a side salad of rocket and tomato.
Orzo Pasta Salad
An easy pasta salad recipe using orzo. Add tomatoes, mozzarella and olives for a simple side that accompanies BBQs, meat and fish dishes or can be enjoyed on its own.
When it comes to summer dishes pasta salads are an essential for me. Whenever we have a BBQ I can guarantee you there will be a pasta salad on the side, along with other essentials like potato salad, veggie kebabs and so on.
What is orzo?
Orzo still isn’t that well used in the UK but it’s a great pasta for a range of dishes, whether it’s to accompany meatballs, soups or for exactly this, a pasta salad. It’s not to be confused with risotto which is rice, Orzo is made with durum wheat semolina and water, but it can be cooked in a similar style to risotto, which makes it great for one pot dishes.
Perfect for a BBQ side dish
This orzo pasta salad recipe can be enjoyed on its own, with meat and fish or even stuffed into peppers.
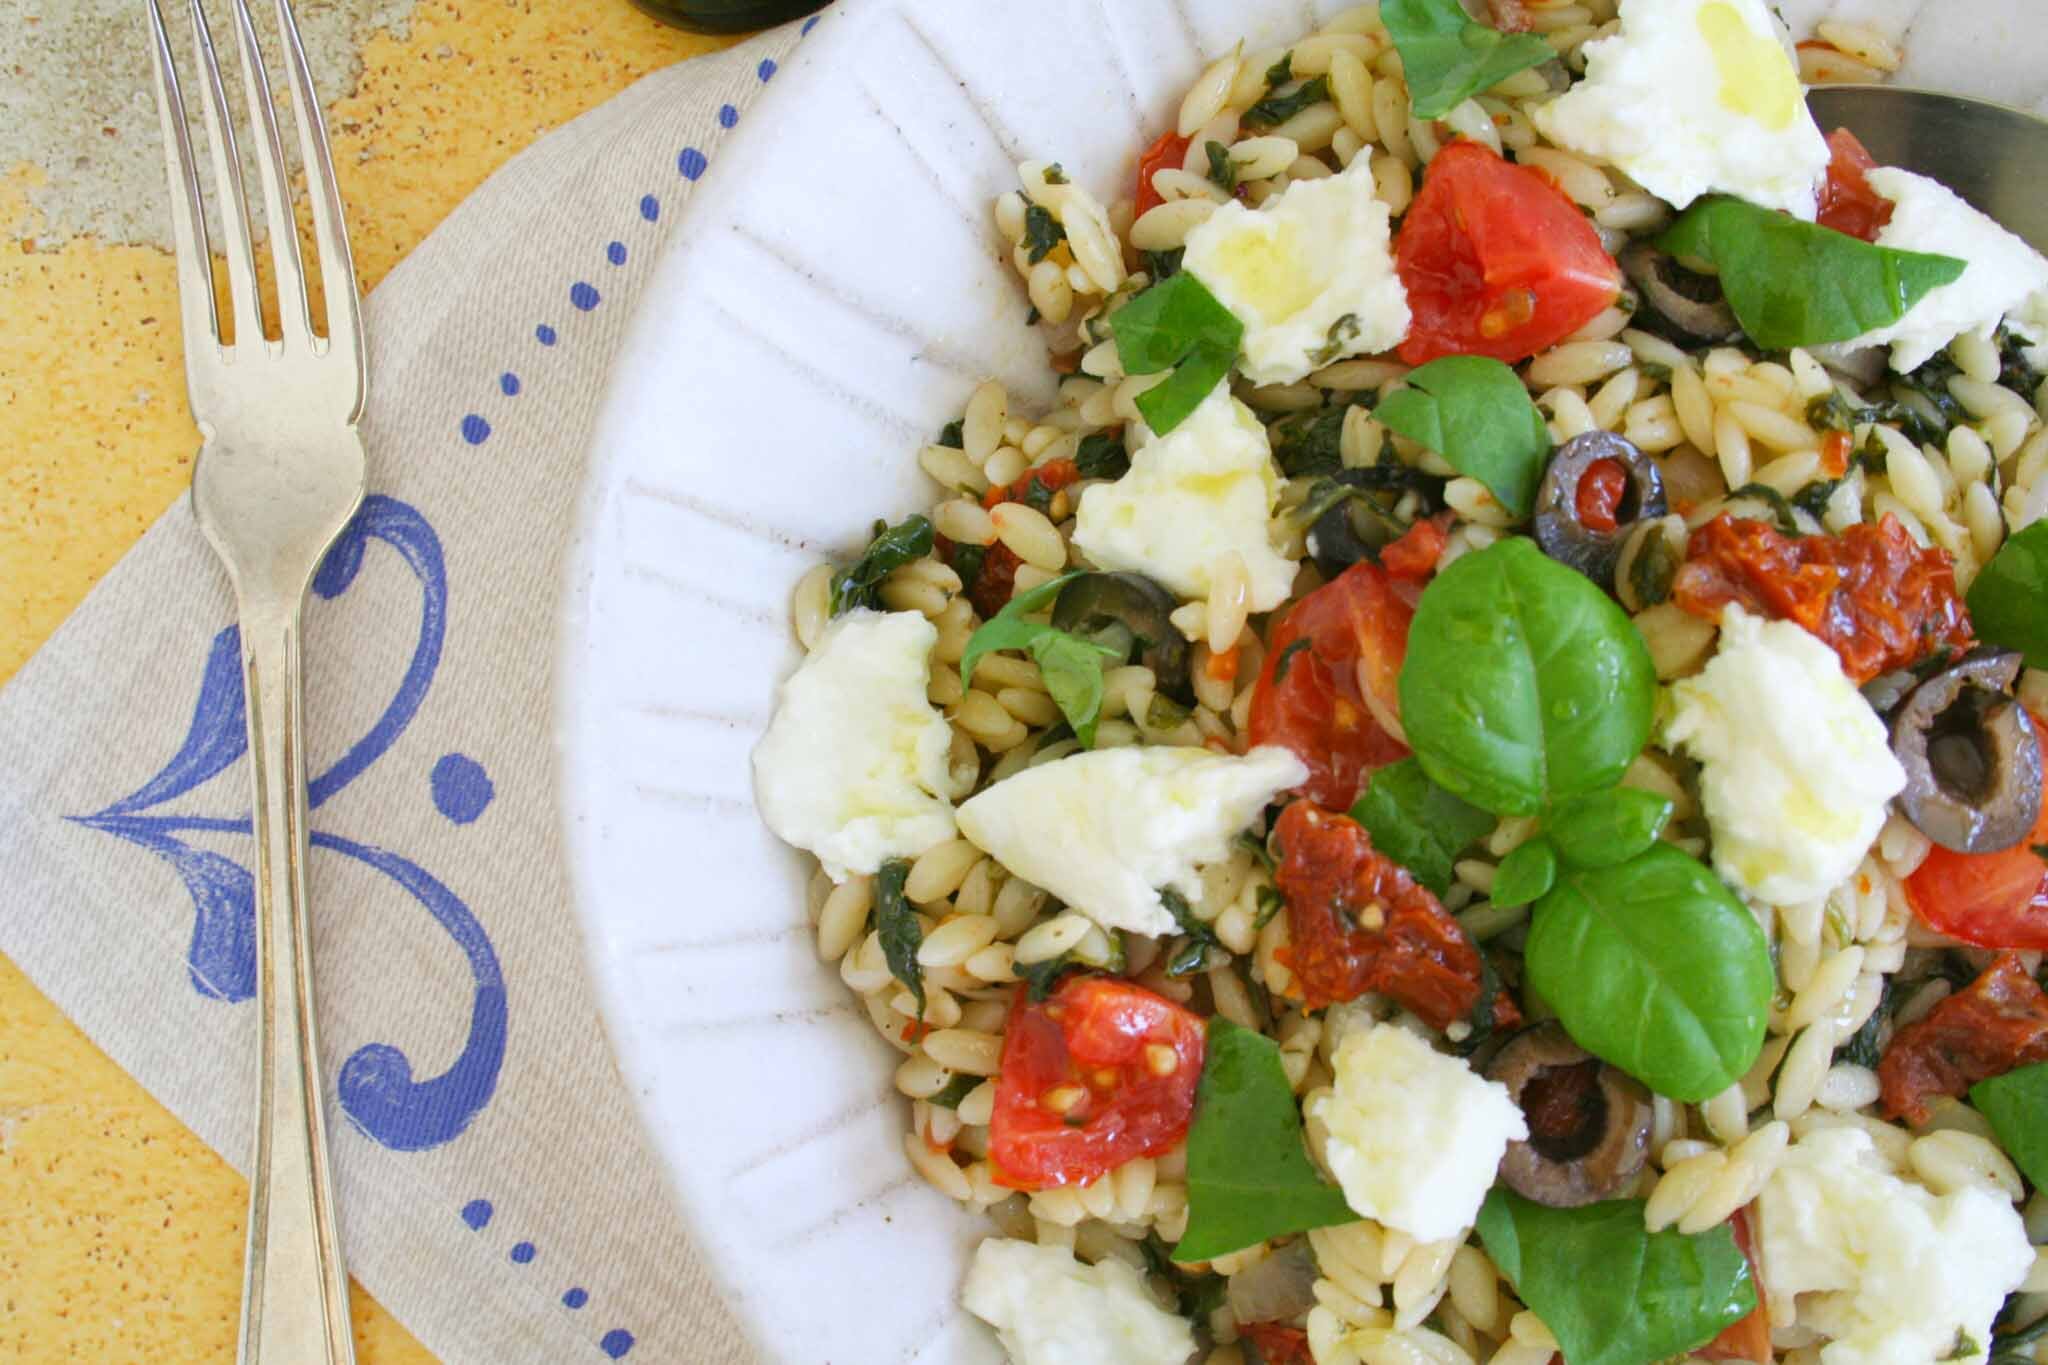
Orzo Pasta Salad | Sundried tomatoes, mozzarella and olives
Prep time: 5 minutes | Cook time: 20 minutes | Serves: 6 people as a side | Nutrition: 353 calories per serving
Ingredients
- Filippo Berio Extra Virgin Olive Oil
- Fillipo Berio Red Wine Vinegar
- Juice of 1 small lemon
- 200g orzo
- 2 shallots, finely sliced
- Handful of sundried tomatoes in oil, roughly chopped
- 100g Spinach
- 150g Cherry tomatoes, halved
- 2 tbsps Black olives, sliced
- 1 ball of Mozzarella (keep the mozzarella water)
- Fresh basil / dried herbs
Instructions
- Add some Filippo Berio Extra Virgin Olive Oil to a pan and on a low heat cook your finely sliced shallots for a couple of minutes. Season with a little salt and some dried herbs if you have them.
- Add the mozzarella water and bring to a gentle simmer.
- Then add your orzo and 250ml of boiling water, allow to simmer for 5 minutes, occasionally stirring.
- After 5 minutes add another 150ml of boiling water and you can add frozen spinach at this point (make sure you have defrosted and squeezed out any excess water).
- After another 3 minutes, add a final 50-100ml of water to finish cooking your orzo so it’s al dente and has a creamy finish.
- Turn the heat off, add your olives and sundried tomatoes and leave to cool while you make your dressing.
- To make the dressing add 2tbsps of Filippo Berio Red Wine Vinegar, the juice of one small lemon and 6 tbsps of Filippo Berio Extra Virgin Olive Oil. Mix together to create a dressing and drizzle over the orzo, stir to combine.
- Add your tomatoes.
- Once cooled, transfer to a serving bowl and place in the fridge for about an hour to allow all the flavours to come together.
- When you’re ready to serve, add your mozzarella, tear fresh basil over the top, and finish with a drizzle of Filippo Berio Extra Virgin Olive Oil

I’d love to see if you recreate this dish so please tag @CookingCarafes and @FilippoBerio and we’ll share them.
This is part of a paid for collaboration with Filippo Berio during the Covid-19 Crisis.
You might like…

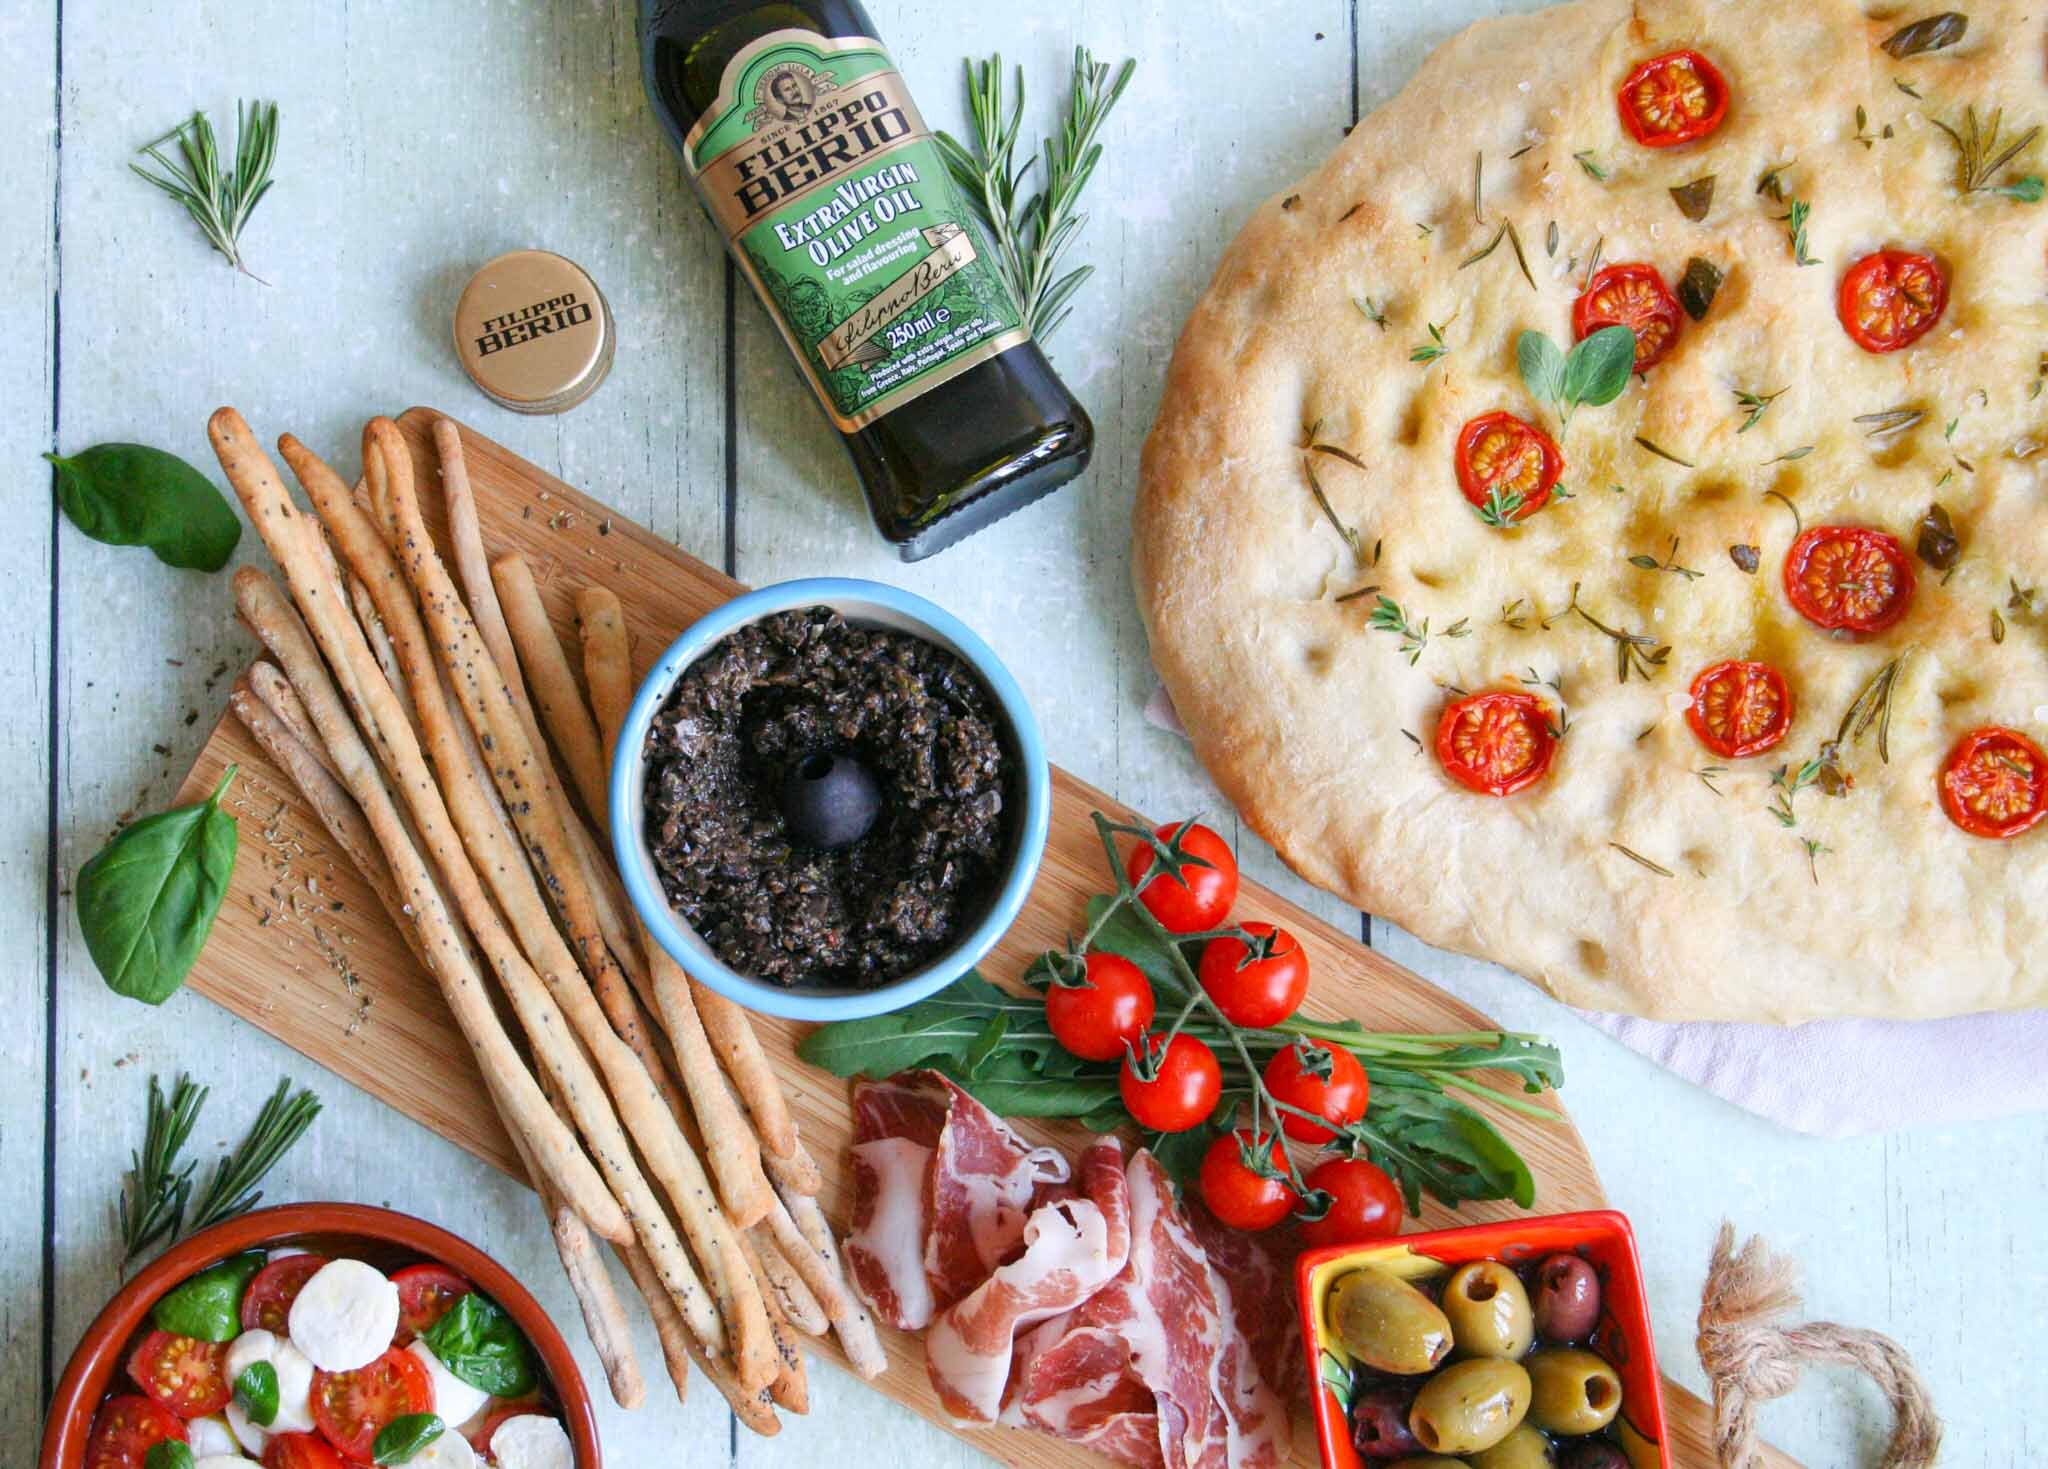
Focaccia
Focaccia is an Italian style bread that is quite easy to make, you just need to allow yourself a little time!
This is one of my most asked for recipes after my workshops. I always make fresh focaccia to serve alongside antipasti platters in my Pasta Making Workshops, and there’s never any left!
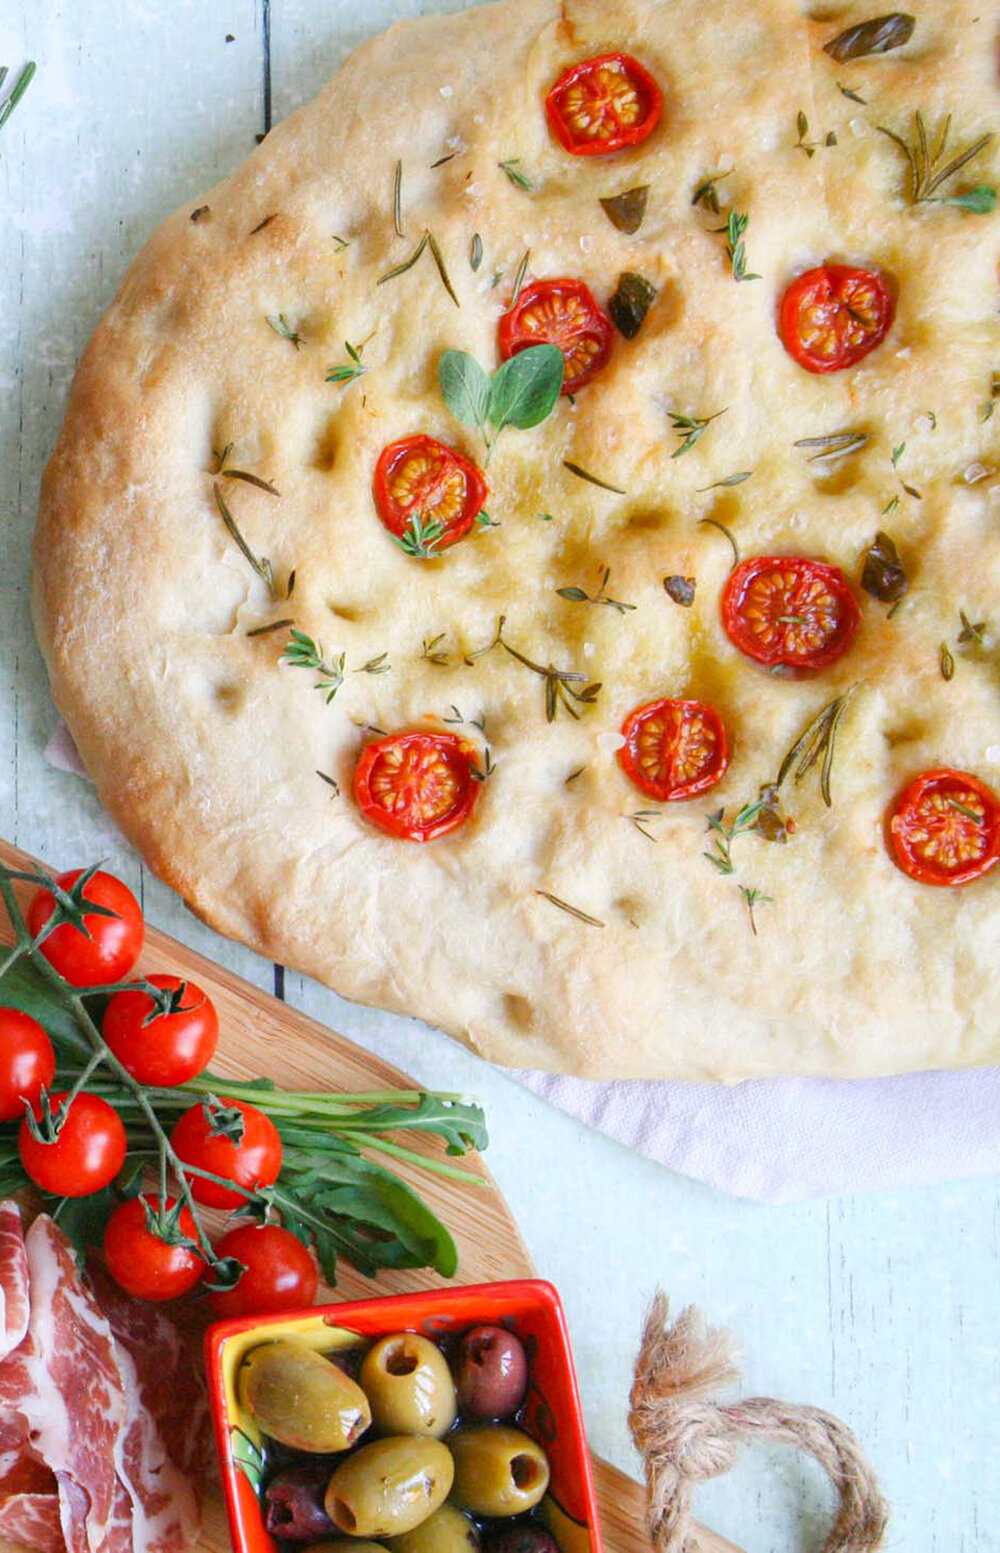
What I love most about focaccia is you can change the toppings to suit the season or your mood. I love a classic topping of fresh rosemary, and sea salt with plenty of golden Extra Virgin Olive Oil.
Sometimes I stuff halved cherry tomatoes into the springy dough to let it engulf around the tomato. As it roasts, and the bread bakes, the sweetness of the tomatoes comes out. It’s always the best bite when you get a deliciously soft, doughy part of focaccia with a bite of sweet tomato and a little sea salt!
Make ahead of time
This recipe is pretty fool proof, it never seems to fail me. Although there is a lot of time between proving and resting the actual process of making the dough and baking is all relatively quick, so just make it on a day where you know you’re home for a few hours, and if you want it fresh, leave enough time to make it!
Keep focaccia fresh by freezing
You can also freeze focaccia. I often make one big one and cut it into halves or quarters and then freeze them. You just warm them through in an oven for 10 -15 minutes when you fancy a slice of warm italian bread.
Focaccia serving suggestions
Eat it on its own, dip it in extra virgin olive oil or serve with meats, cheese and olives for a traditional antipasti.
Focaccia | Italian Bread Recipe
Prep time: 10 minutes | Cook time: 15 minutes | Serves: 2 | Nutrition: 226 calories per serving
Ingredients
- 500g strong bread flour
- 7g fact action yeast
- 1 tsp salt
- 300ml warm water
- Extra Virgin Olive Oil
Instructions
- In a bowl mix the yeast, flour and salt together; then make a well in the middle and add 3 tbsps of extra virgin olive oil and the warm water
- Then knead for at least 10 minutes it will go beautiful and springy
- Place the dough in a large bowl that has bee brushed with extra virgin olive oil and cover. Leave to rest for an hour.
- Then gently slide into a large, deep baking tray that is again brushed in olive oil and use your hands to create dimples in the dough. Keep it about 3cm deep.
- Cover and leave to rest for 45 minutes
- Using your fingers create more dimples in the dough. Add you toppings of choice and drizzle in extra virgin olive oil. You can eep it simple with rosemary and sea salt.
- Cook in a preheated oven at 180 degrees for 20 minutes, or until lightly brown on top
- Leave to cool on a wire rack
An easy recipe using casarecce pasta, combining the sweetness and freshness of cherry tomatoes, the heat of chilli and balanced with tangy feta and basil